Difficulty: Intermediate
This tutorial covers the implementation of a left click function that picks up objects to move around, and click again to drop. There are multiple ways to do this, several of them utilizing the Physics Handle component. I will not use that. If you’d prefer to use a physics handle, see this tutorial. I will be using a Spring Arm, the same component the ThirdPerson template camera uses. This will keep the object at an exact point we define, while still reacting to collision if the object is pushed into a wall or object.
Note: I removed the FirstPerson gun, meaning I started with no Fire InputAction. Learn how to remove the gun here.
1. First, open the FirstPersonCharacter Blueprint in FirstPersonBP/Blueprints/
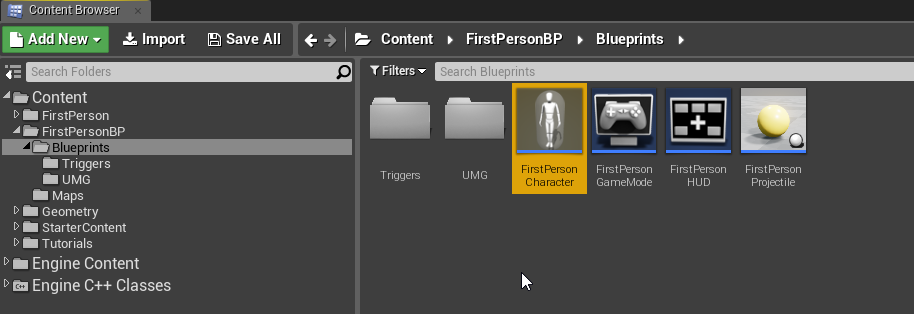
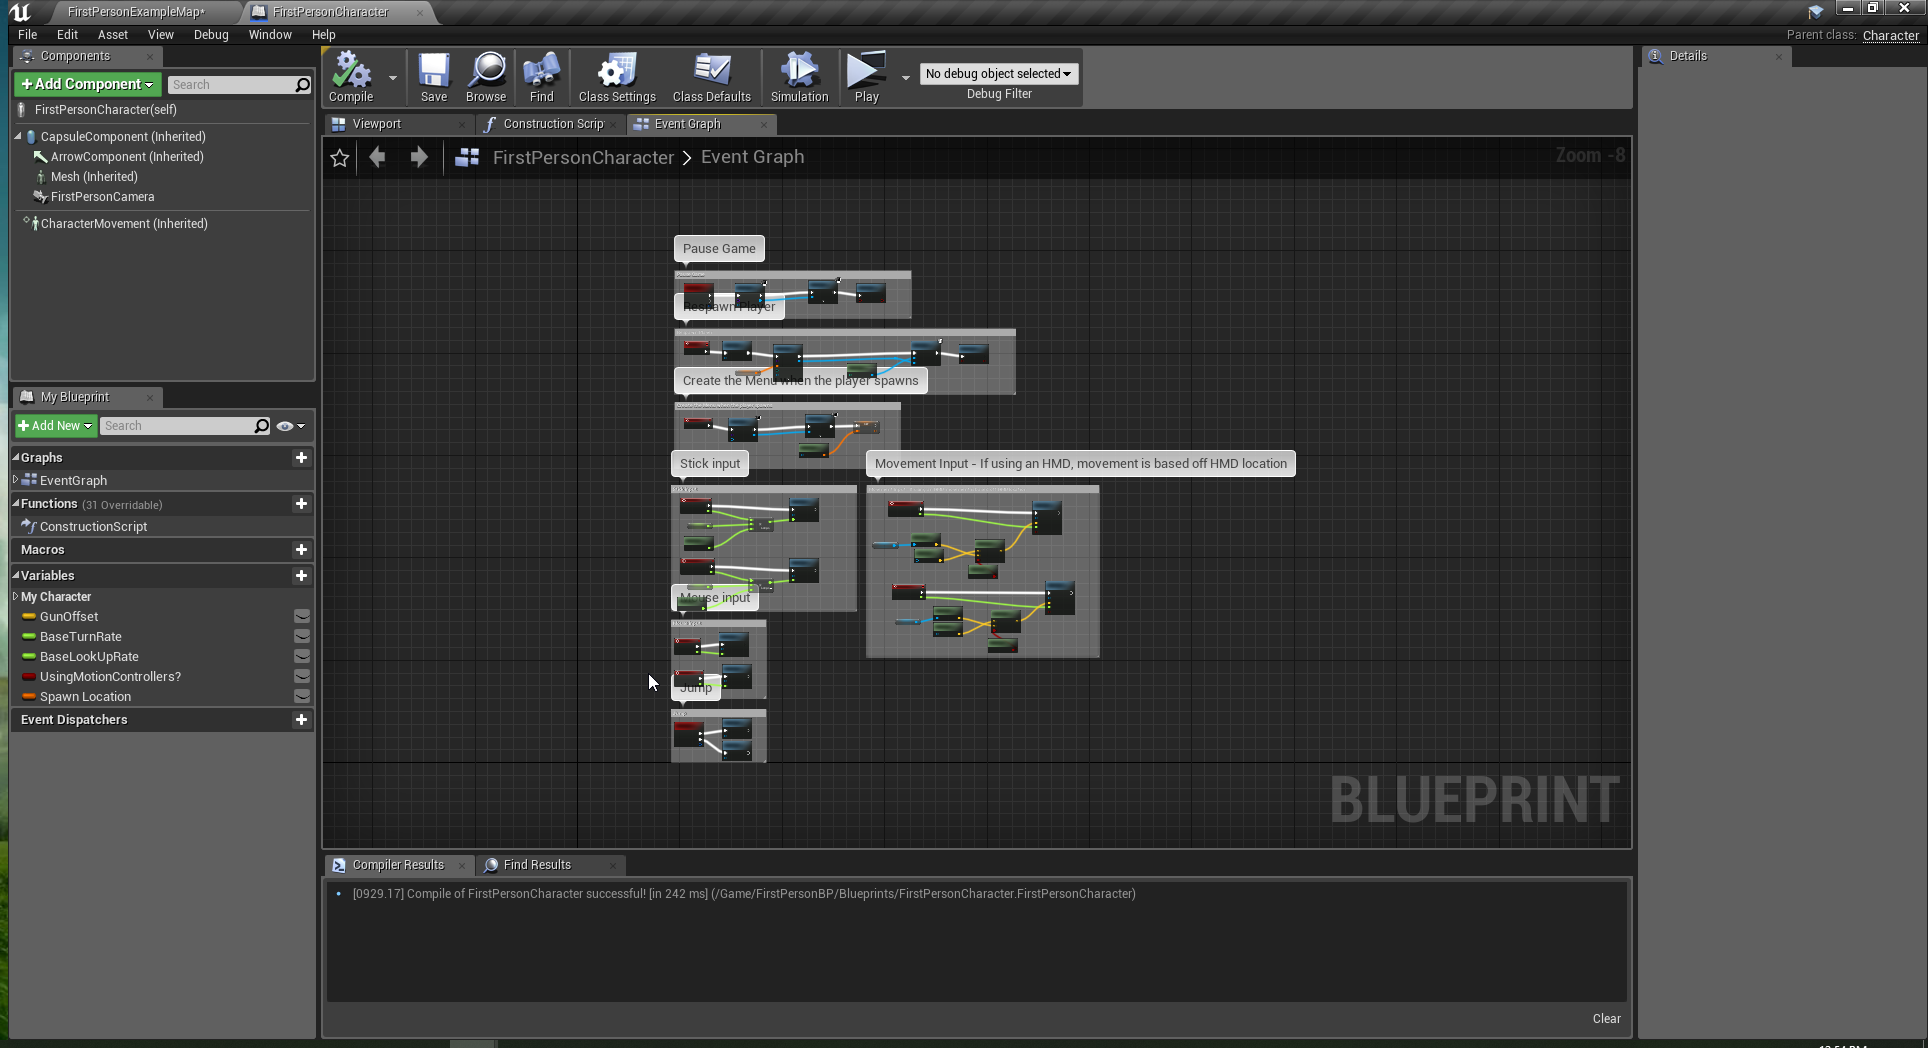
Note: Yours may look different than this one, depending on if you modified it previously.
2. If you’re missing the InputAction Fire event, start by re-adding it in the Event Graph by right clicking and searching for Fire.

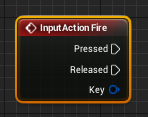
If you’d prefer to add a different key bind, follow steps 1 and 2 here. Alternatively, add a key by typing Key __in the Event Graph.

3. Right click and add a Line Trace By Channel node to the Event Graph. Connect it to the Pressed output on the Fire node.
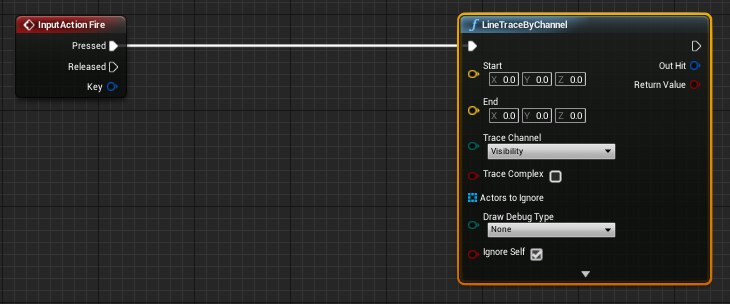
A line trace is simple, but extremely useful. By using a Start and End vector, a line can drawn between these vectors. If the line hits, you can detect what actor, where it hits, the bone name, and more. The Unity equivalent is a Ray Cast.
4. Next, drag the FirstPersonCamera from the Components panel to the Event Graph. This will create a node representing the camera.

5. From the output of the Camera node, create a GetWorldLocation and GetWorldRotation node.

6. Connect the GetWorldRotation to a GetForwardVector, multiply that by 500, and add that vector to the GetWorldLocation node. Connect the GetWorldLocation to the Start Input of the LineTrace, and connect the Addition to the End.
What we’re doing is starting our line at the Camera’s origin, and ending it 500 units forward where the player is facing.

7. On the output of the LineTraceByChannel, add a Branch and a Break Hit Result.

The Branch is checking if the trace hits the object, and the Break Hit Result lets use get the info if it hits.
8. a. Connect another Branch to the True output of the first Branch.
b. From the Hit Actor output on the Break Hit Result, type Get Tags.
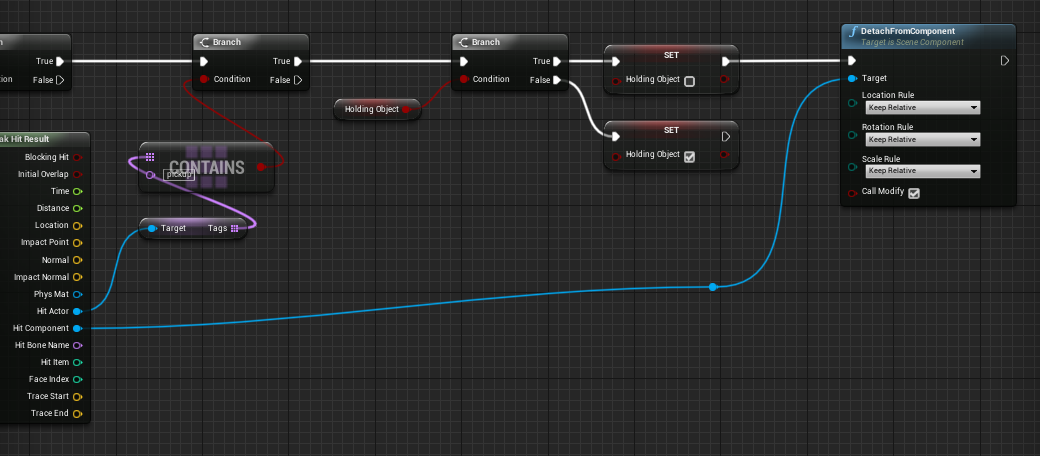
c. On the output of the Tags, create a CONTAINS node. Enter pickup into the second line of the CONTAINS node.
d. Connect the output of that to the Condition input of the Branch.
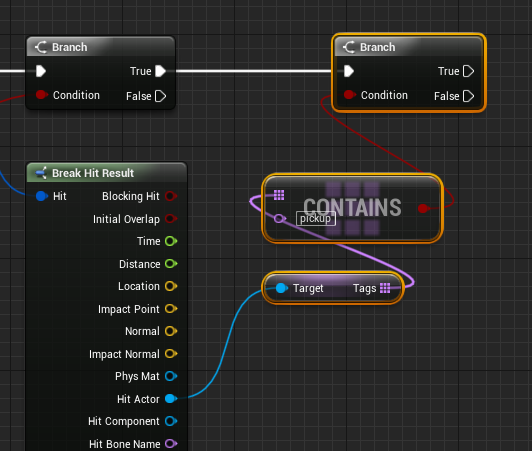
This Branch gets the Actor’s tags, and checks if it has the tag pickup. This way, the player can only lift objects with the pickup tag which we’ll add later.
9. On the My Blueprint panel on the left, create a variable called Holding Object. Connect it to the input of a new Branch.


10. Drag in the Holding Object variable, but instead of selecting Get, select Set. Connect each one to the True and False outputs.
Set the False output’s Set Holding Object to true.
Now, when each time we click on a holdable object, it will toggle back and forth between held and unheld.
11. Let’s make the Detach section first. Drag a line from the Hit Component output on the Break Hit Result and create a Detach From Component node.
Tip: Double click on a wire to create a reroute node for better organization.
12. Change each input on the Detach From Component to from Keep Relative to Keep World.

13. Connect the same blue line from the Hit Component to a Set Simulate Physics node, and set it to true.

14. Create two Set Collision Response To Channel nodes. Set the first node to Channel: Camera and New Response: Block. Set the second node to Channel: Pawn and New Response: Block.
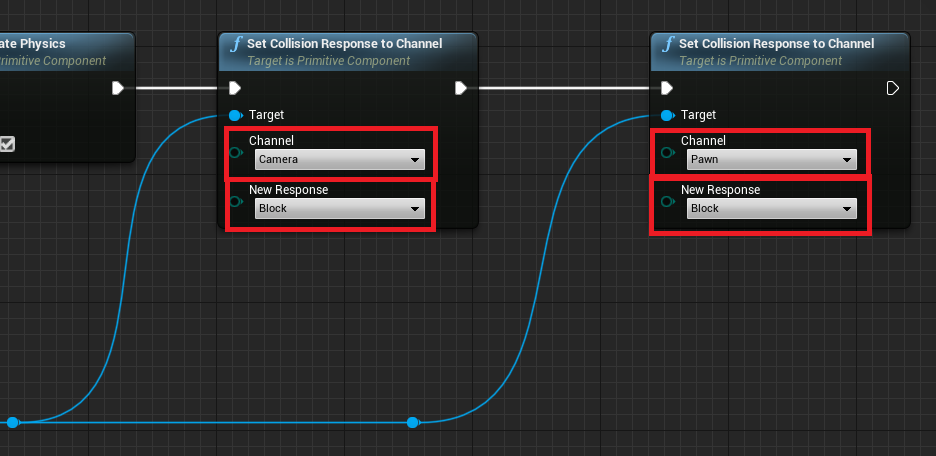
15. The drop section is done! Now, on to the pickup section. First, we need to add the location where we want the object to go to when it’s picked up.
With the FirstPersonCamera selected on the Components panel, add a Spring Arm, and then add a Sphere Collision to the Spring Arm.

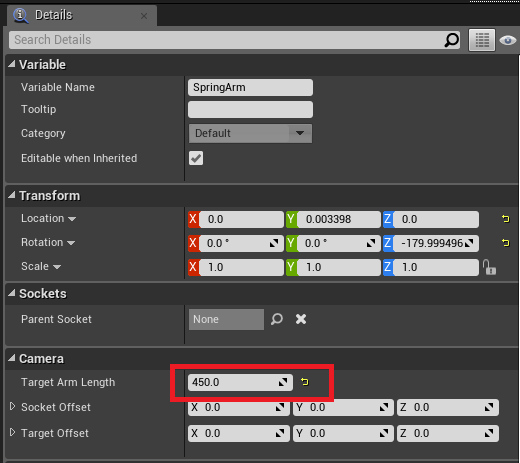
16. Select the SpringArm component. On the Details panel on the right, set the Target Arm Length to 450.
The Sphere Collision is the location we’re putting our picked up object, and the Spring Arm is checking for collision and not letting us put the object through other objects.
17. Create an Attach To Component node, connected to the old Hit Component wire. Connect our Sphere to the Parent input, and change the:
Location Rule: Snap To Target
Rotation Rule: Keep World
Scale Rule: Keep World

Note: There are two AttachToComponent nodes! Make sure the target is SceneComponent and not Actor.
18. Copy and paste the same two Set Collision Response to Channel nodes from above, but change the New Response to Ignore on both.
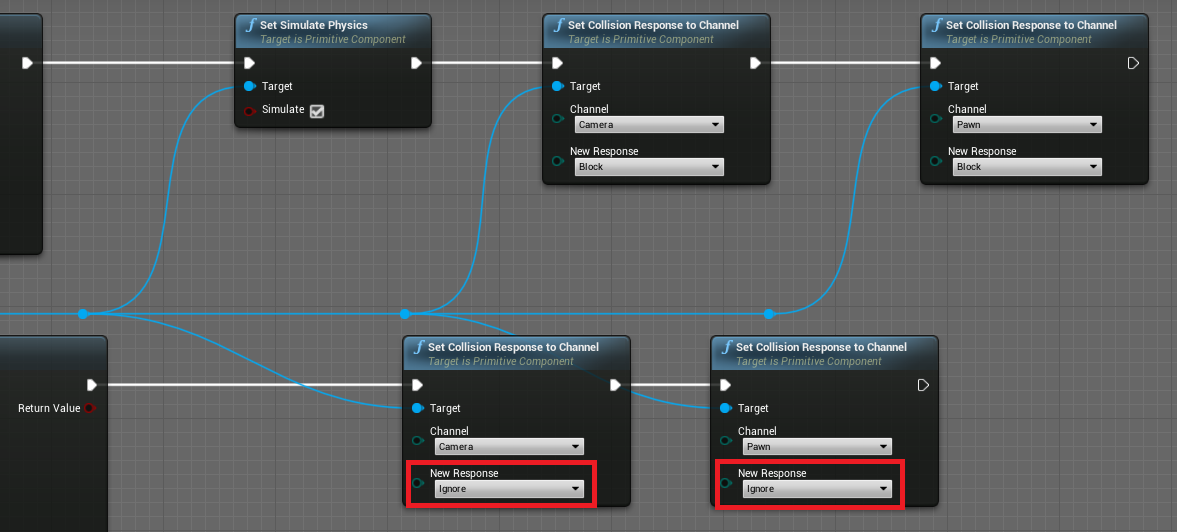
We’re all done with the Blueprint stuff! All that’s left is adding the tags to whatever we want to pick up.
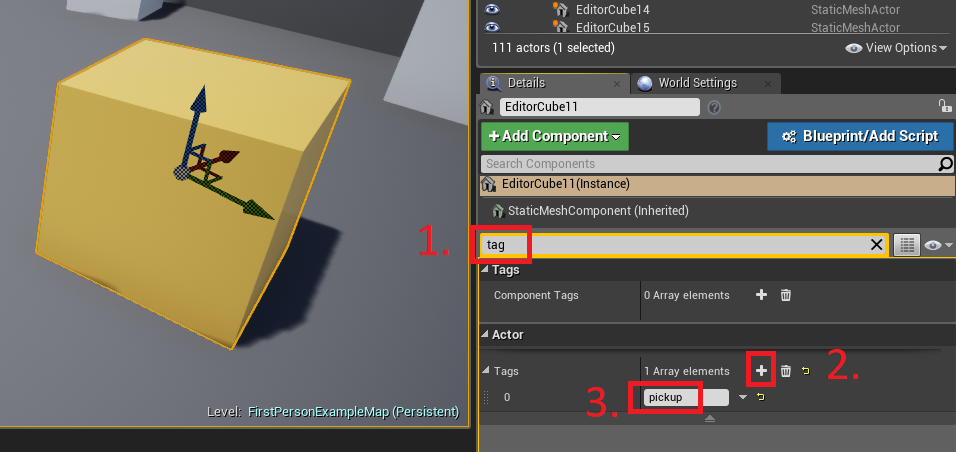
19. To add the pickup tag to an actor: Select the actor, search ‘tag’. Click the + sign to add a new tag, and type pickup.
20. All done!
