Difficulty: Beginner
In this tutorial we will make an in-game pause menu that allows you to resume or go back to the main menu.
Note: The main menu is a prerequisite for this tutorial, as we’re re-using the main menu design here. Most of the setup is identical, with a few changes and additions.
1. Start by duplicating the Main Menu Blueprint we created in the previous tutorial. This can be done by navigating to FirstPersonBP/Blueprints/UMG/. Files can be duplicated by first selecting the file, and then pressing CTRL W.
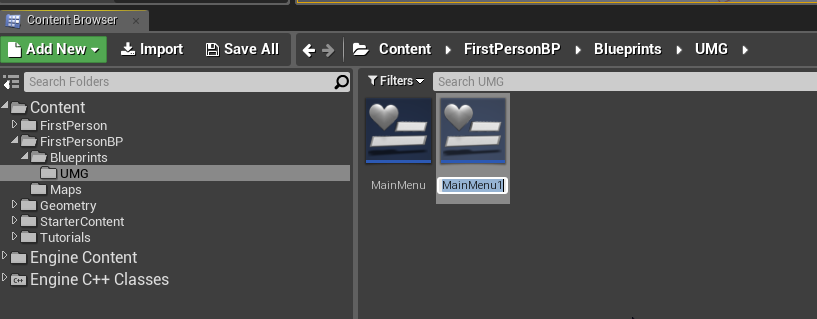
2. We can immediately rename this file to anything; I’ll call it PauseMenu.
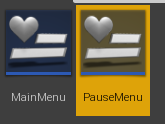
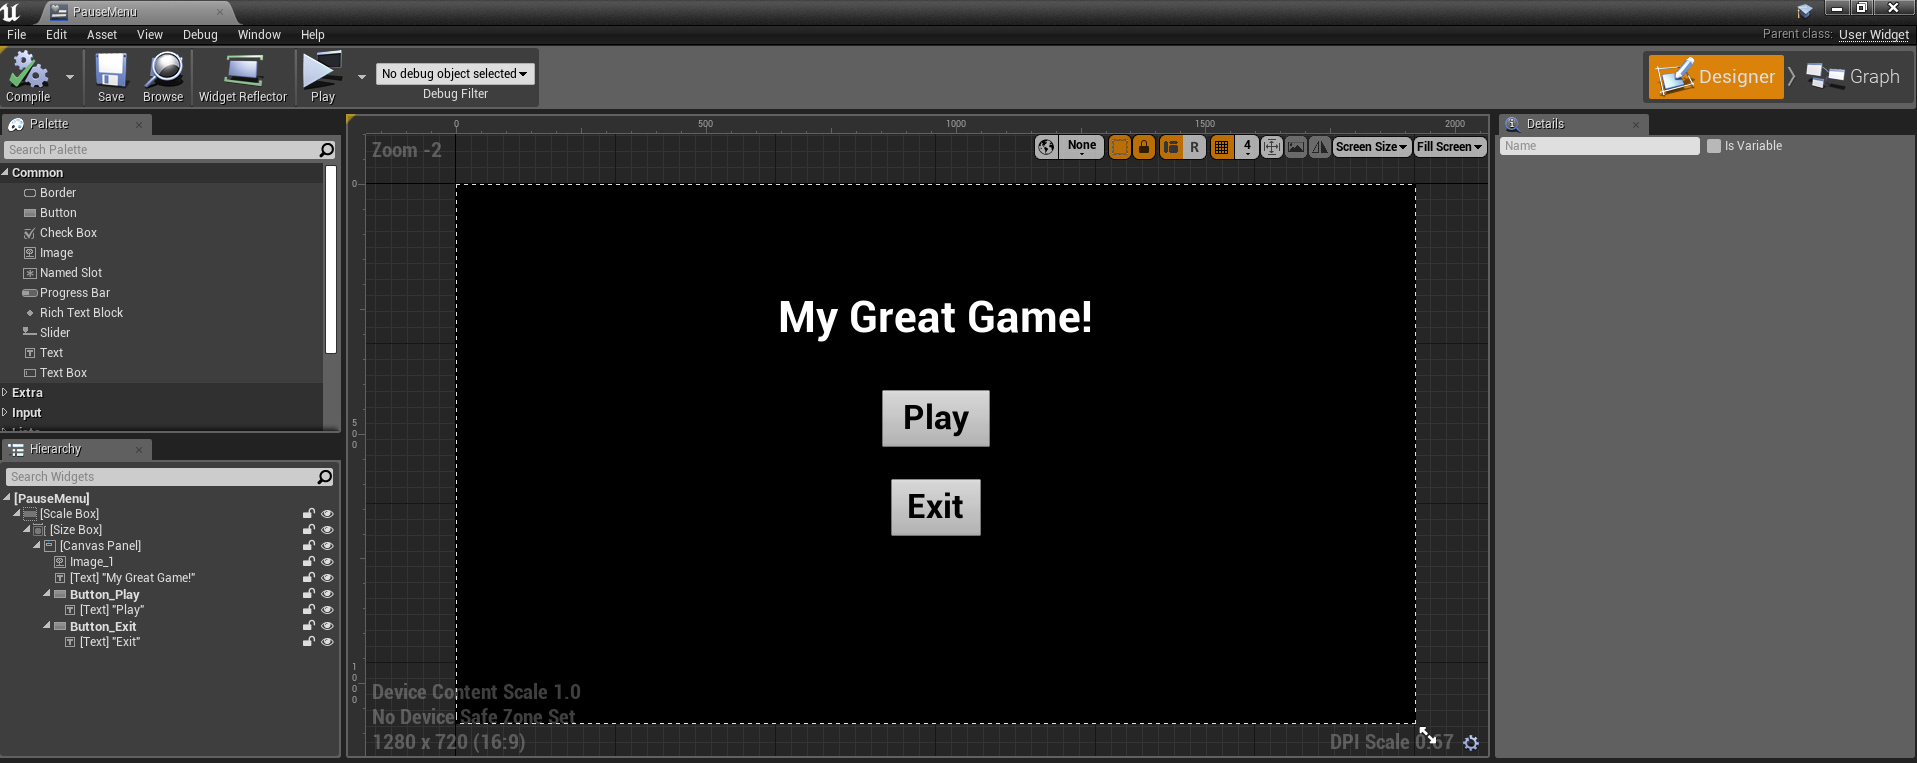
3. Now that we have our new PauseMenu widget, let’s go ahead and double click to open it. This file is identical to the one we made before, including the button scripting.
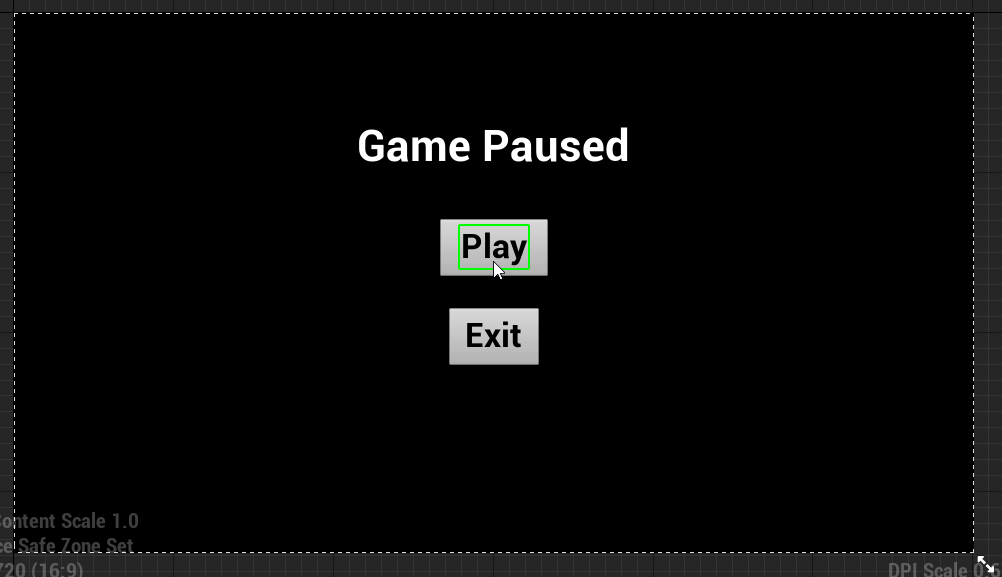
3. First, let’s change the name. Click on the game title to select it. You’ll know any element is selected when a Green Outline appears around it.
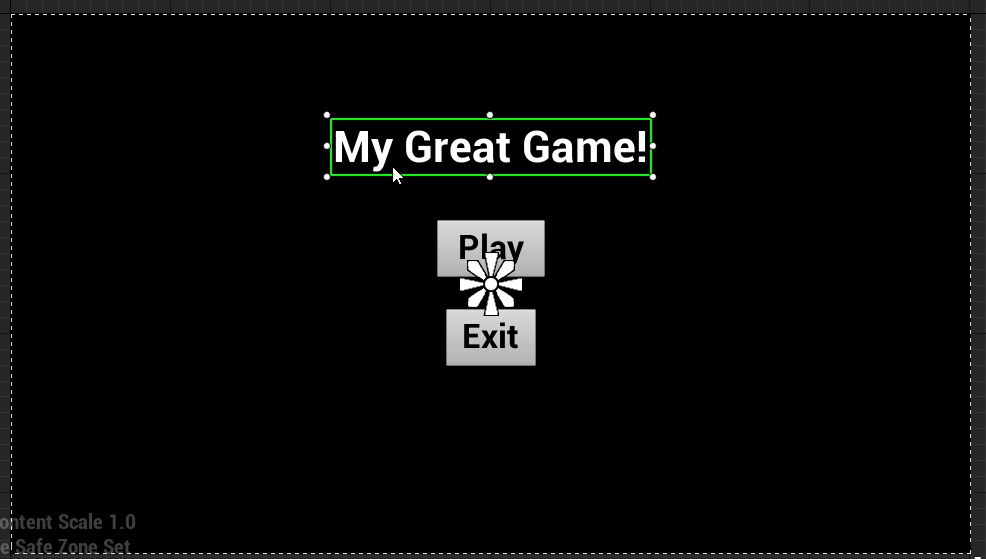
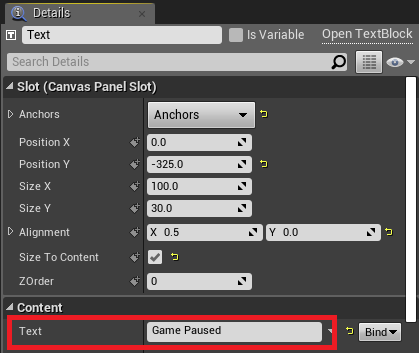
4. Change the Text on the Details panel on the right to Game Paused.
5. Click on the Play Button’s Text to select it.
Note: Clicking on the button outside the text will select the button, and not the text.
6. Change the Text on the Details panel to Resume.
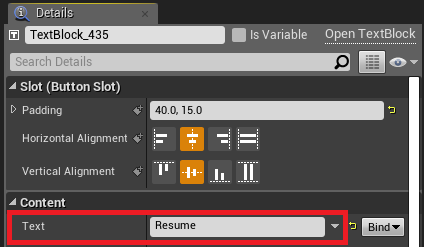
7. Select the Exit button’s Text, and change it to Main Menu.
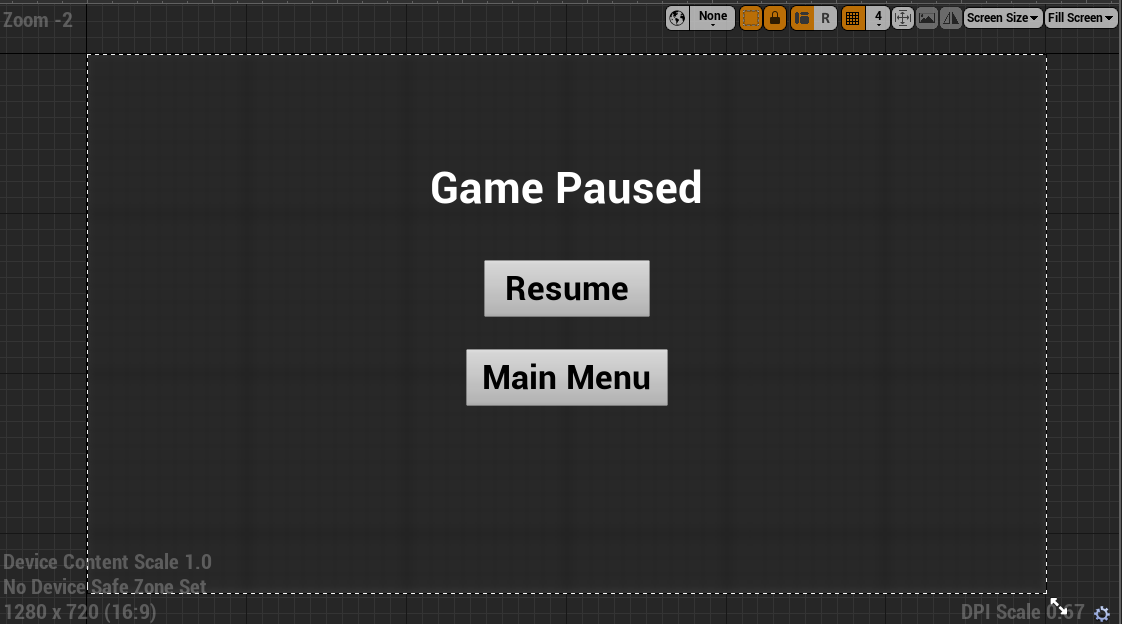
8. After those changes, our Menu should look something like this:
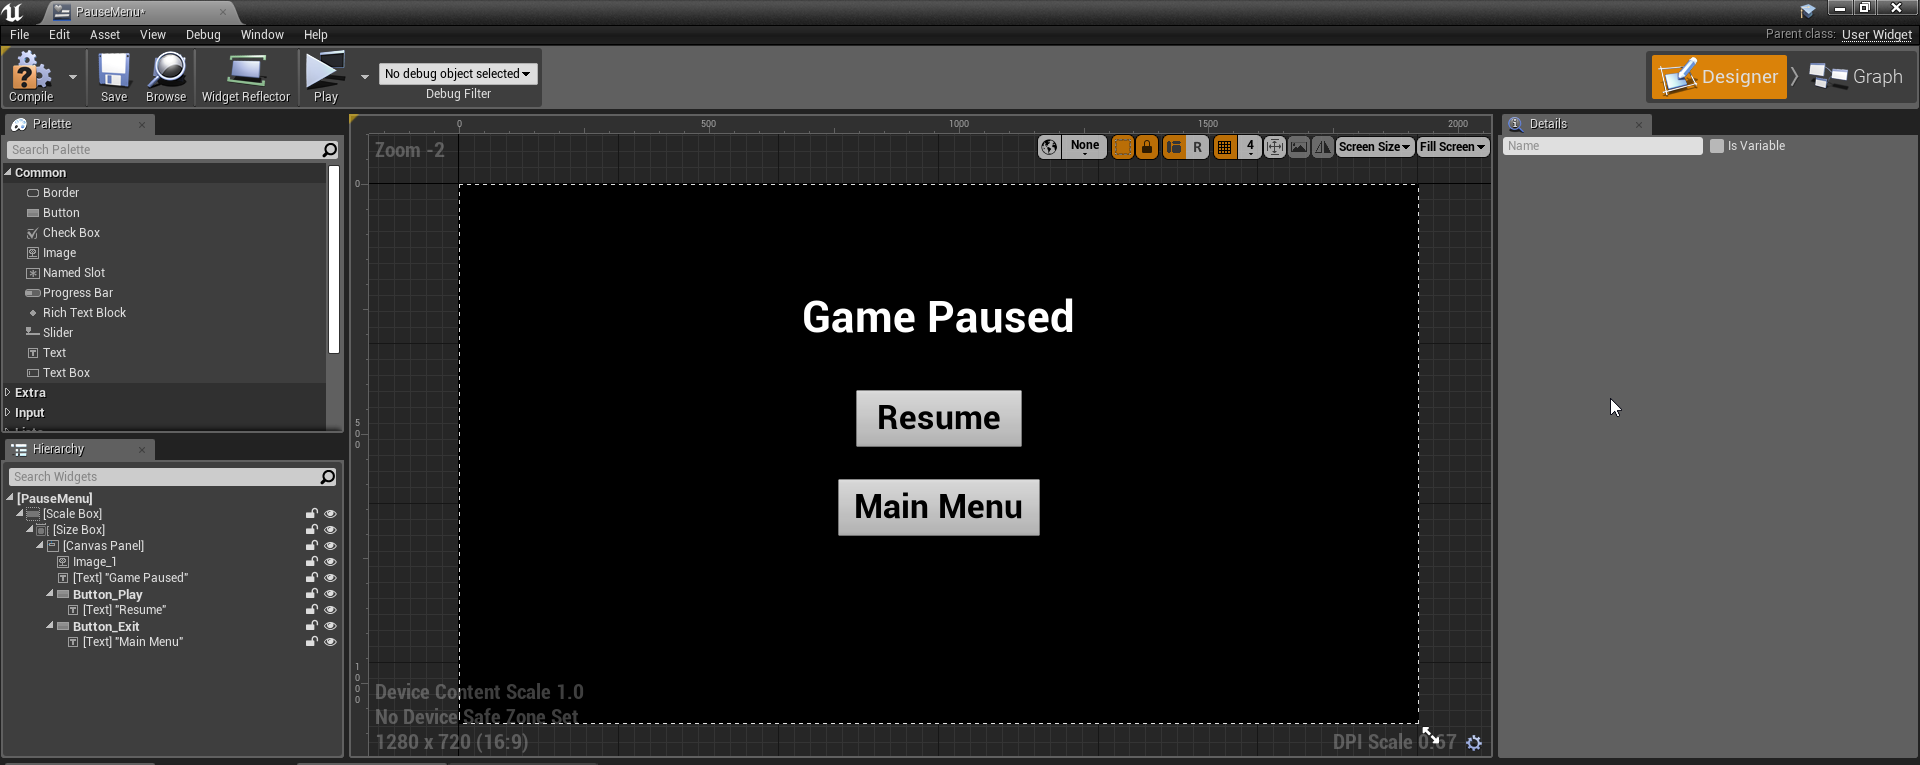
An easy way to instantly signify that the player’s paused rather than on the main menu is to replace the current black background with a Background Blur. If you don’t want this, skip to step 14.
9. On the Hierarchy panel on the left, select the Image_1 element. This is the black background.
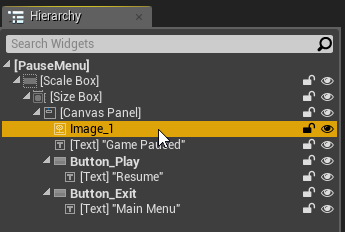
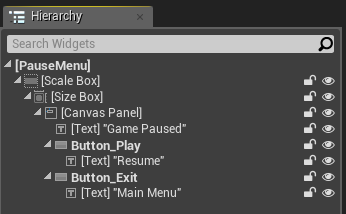
10. Remove the layer by pressing Delete or Backspace.
11. On the Palette panel above the Hierarchy, search Blur to easily find the Background Blur element.
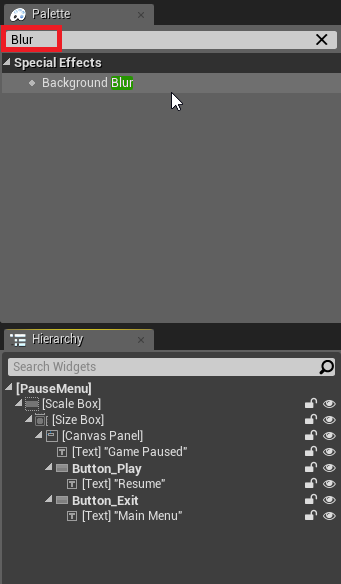
12. Click and drag this element in between the Canvas Panel and Game Paused on Hierarchy. Release the mouse to insert the element.
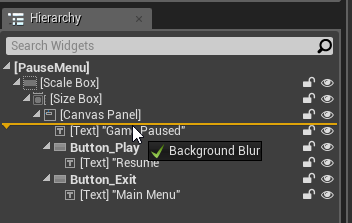
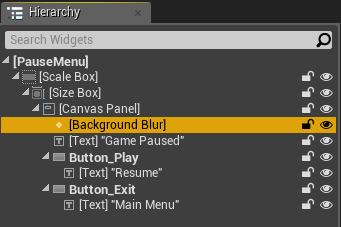
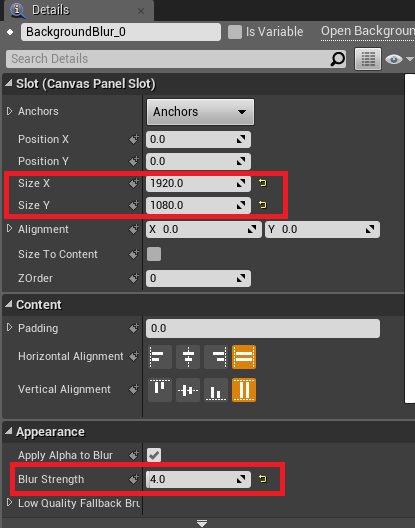
13. With the Background Blur selected, change its
Size X to 1920
Size Y to 1080
Blur Strength to 4.
Note: The blur strength is not a strict number, I chose 4.
The blur’s effect can be seen directly inside the designer.
14. Let’s rename the button’s variable names in the Hierarchy. Click on a button and press F2 to rename. Each button must be done separately.
Change Button_Play to Button_Resume.
Change Button_Exit to Button_MainMenu
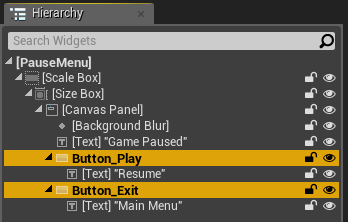
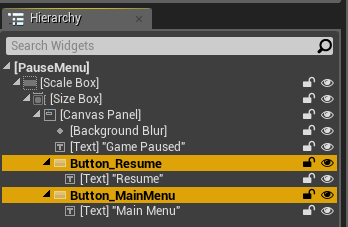
This will make it easier to identify in the Event Graph. Compile and Save this file at the top left of the window.
Now, before we continue to the Event Graph to script the buttons, we need to add some stuff to the FirstPersonCharacter blueprint first, which is the character that the player controls. For now, we can switch away from the designer and go to the main editor window.
15. Open the FirstPersonCharacter Blueprint file located in FirstPersonBP/Blueprints/

16.
There are several ways to make a respawn system. The first way is to simply run the Open Level node and reopen the current open level. The other method is logging the player’s spawn location, and setting them back to the beginning. Method 1 is useful for completely reloading everything in the level, while method 2 is useful for something like a checkpoint system. If you want the first way, follow method 1. If you want to respawn the player and not reload the level, follow method 2. Choose Either 1 or 2, not both.
Respawn Method #1 – Reload the level
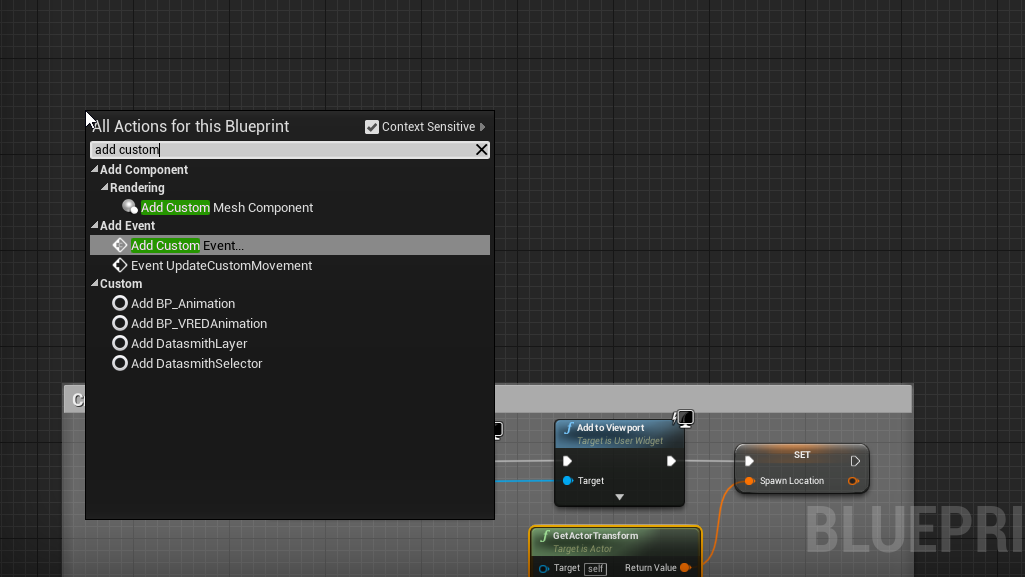
1. Let’s add a respawn function now. In an open space, right click and search for Add Custom Event. This is like a mini-function of sorts.
2. Connect a Get Current Level Name node to the Respawn event.
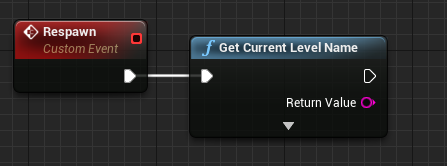
3. Create an Open Level node. Upon connecting the output of the Get Current Level Name to the input of the Open Level node, it will convert the String to the Name variable type.
This is the final function:
Respawn Method #2 – Move them to the spawn location and do not reload the level
1. The first thing we need to do is add a Variable to the player. A variable is a identifying word that represents another value. We can change our variables at any time, which is handy for what we’re using it for. For our variable, we need to store the player’s spawn location, so we can respawn them there when they go all the way back to the main menu.
To create a variable, click the Plus Sign next to the Variables dropdown on the My Blueprint panel
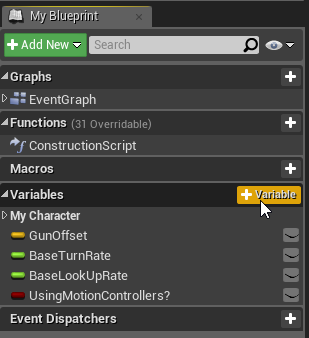
This will add a new variable, which we want to call Spawn Location.
2. With the Spawn Location variable selected, we need to change it to a Transform from a Boolean. On the Details panel on the right, click on Boolean and select Transform.
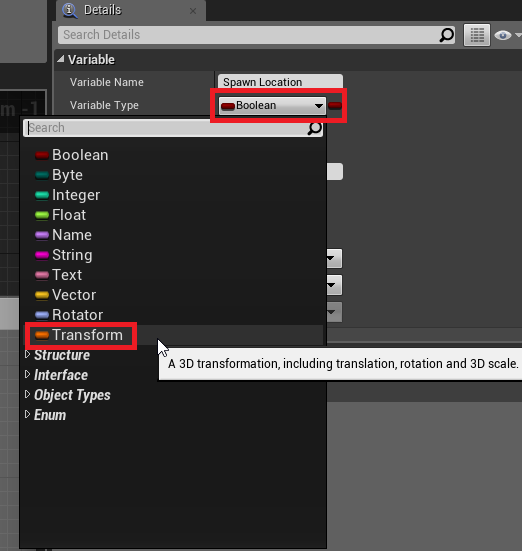
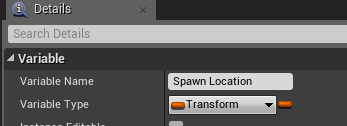
The neat thing about the Transform variable type is that it contains three other types of variables: Vector, Rotator, and Scale. This is great because when we’re resetting where the player is, this will set their original rotation (Rotator), location (Vector), and scale (Scale is pretty circumstantial).
3. Everything in Event Graph is added through the right click mini menu. By right clicking and typing the node name, we can add any available node in the engine, as well as getting our variables we made.
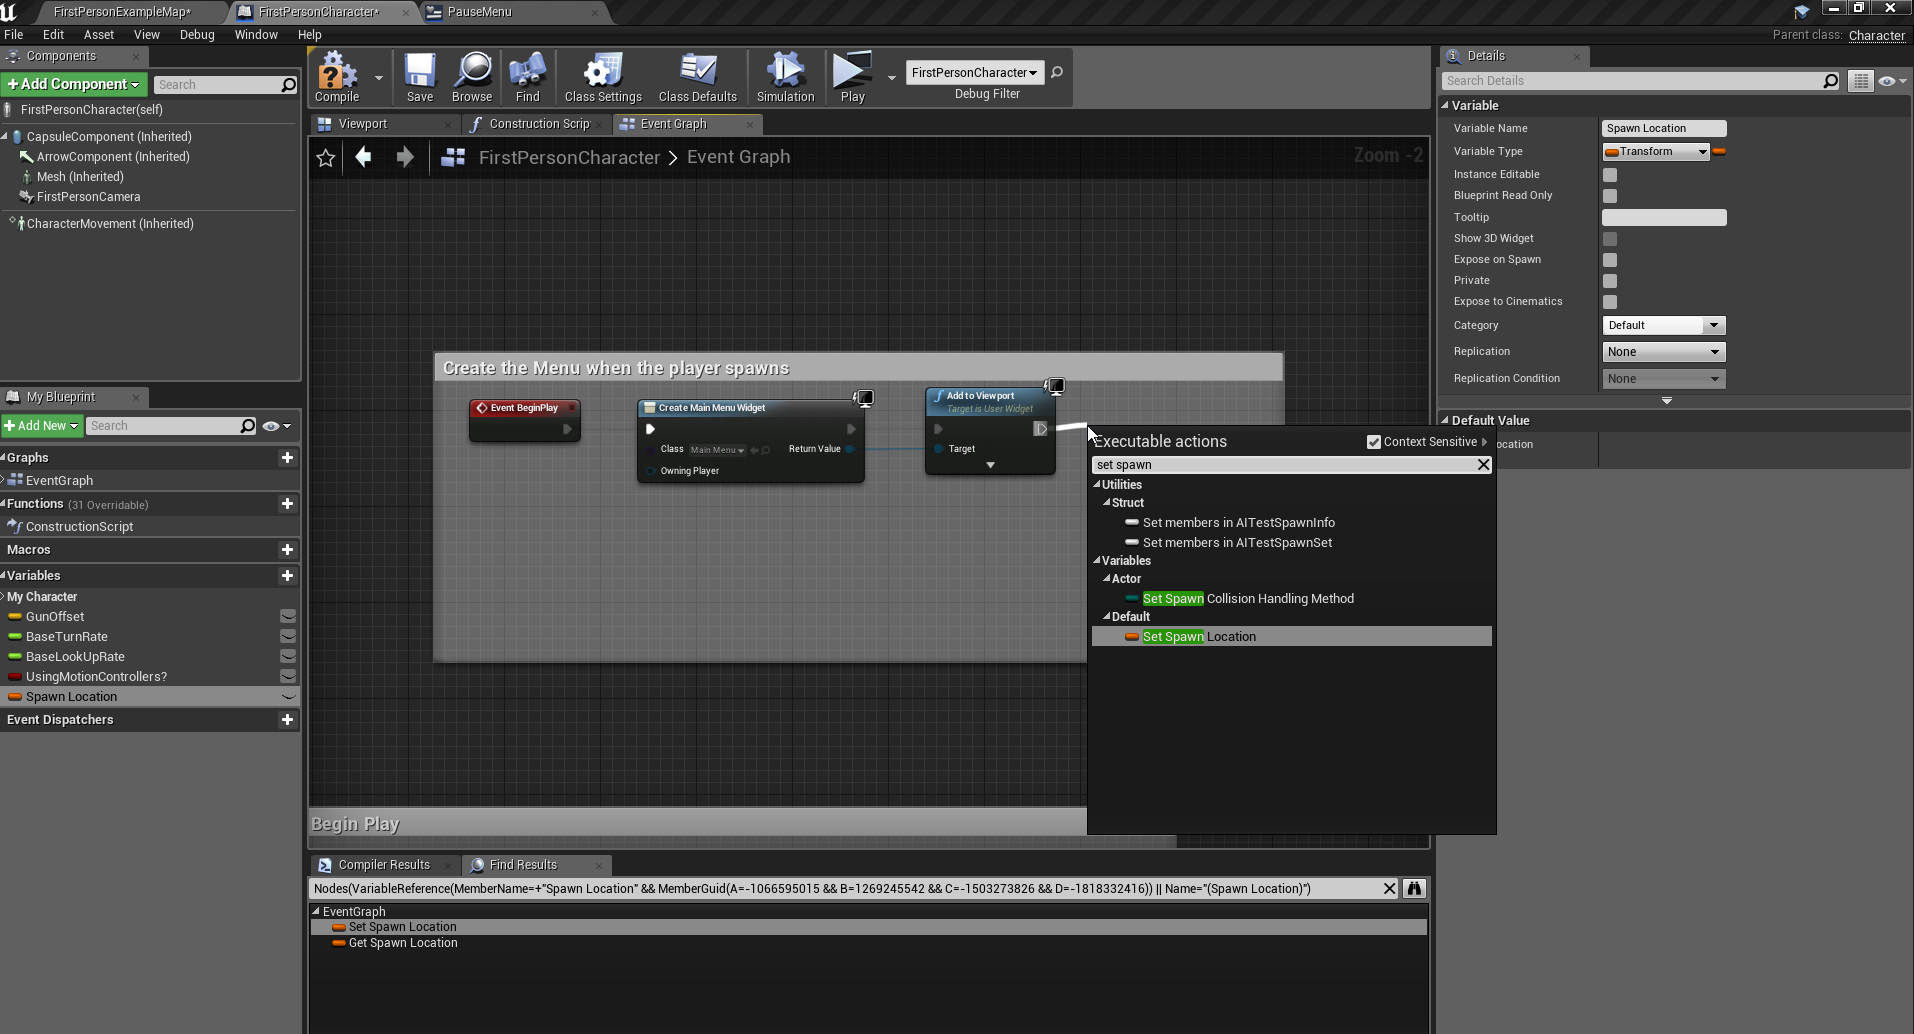
On the Event Graph, we want to set the initial value of our Spawn Location variable. By typing Set Spawn Location, we can get the node to set this value. Add the Set Spawn Location node at the end of the Begin Play function. Right click and type Set Spawn Location and click the result with the orange line (representing the transform variable type).
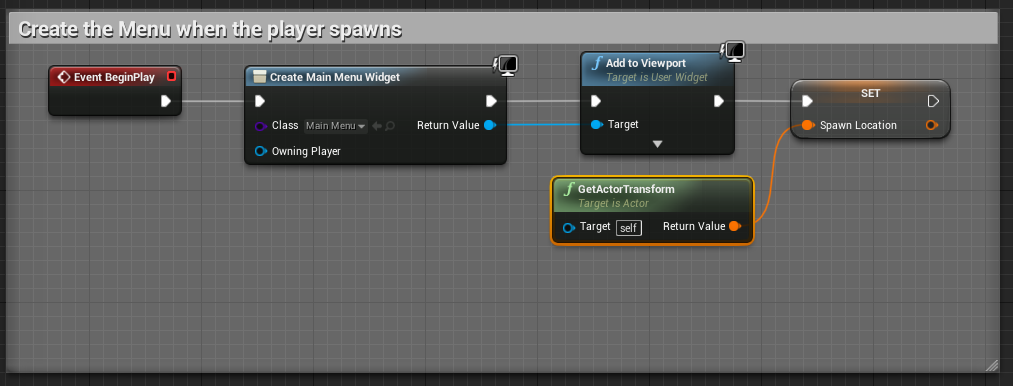
4. Add a GetActorTransform node, which should be green and only have an output. The final function should match this:
5. Let’s add a respawn function now. In an open space, right click and search for Add Custom Event. This is like a mini-function of sorts.
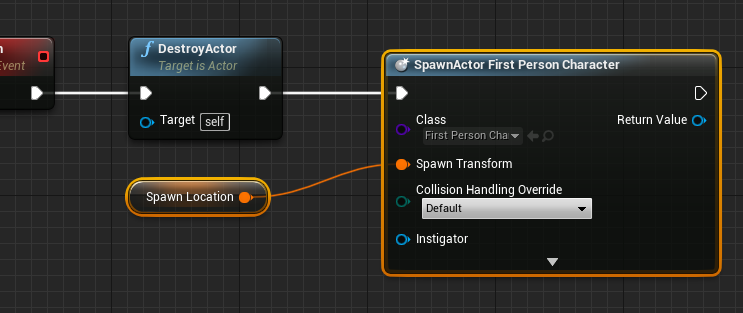
6. Connect the Respawn event to a Destroy Actor node. This will destroy the player character.
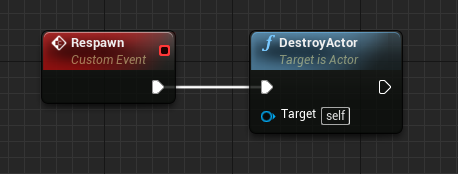
7. Next, create a Spawn Actor node and tell it to spawn the FirstPersonCharacter Blueprint. Connect Spawn Transform to our Spawn Location variable.
8. Create a Possess node and connect it to the Return Value of the SpawnActor node. Create a Get Player Controller node and connect it to the possess node as well.
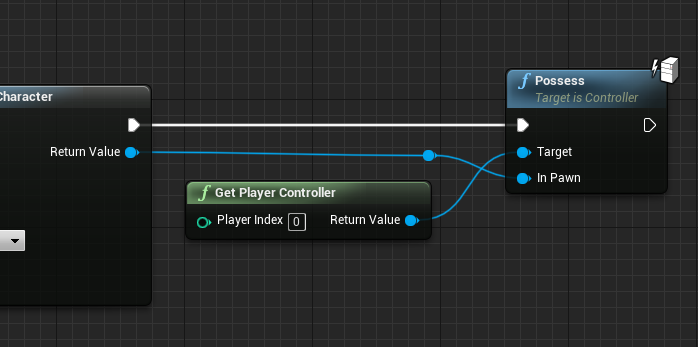
6. Lastly, create a Set Game Paused node to unpause the game once the player is spawned and possessed. This is our final Respawn event:
Tip: Double-clicking on any wires connected to nodes will add a Reroute Node, allowing you to organize Blueprints better.
End of method 2
Right now there’s no way to open the pause menu. Let’s fix that by adding a keybind.
22. At the top of the screen, click Edit -> Project Settings
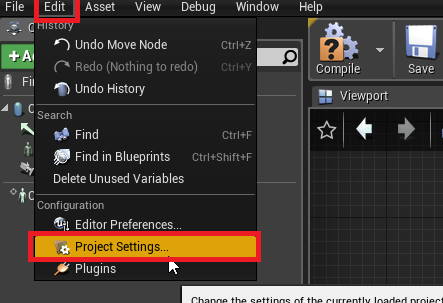
This will open all settings specific to this project only.
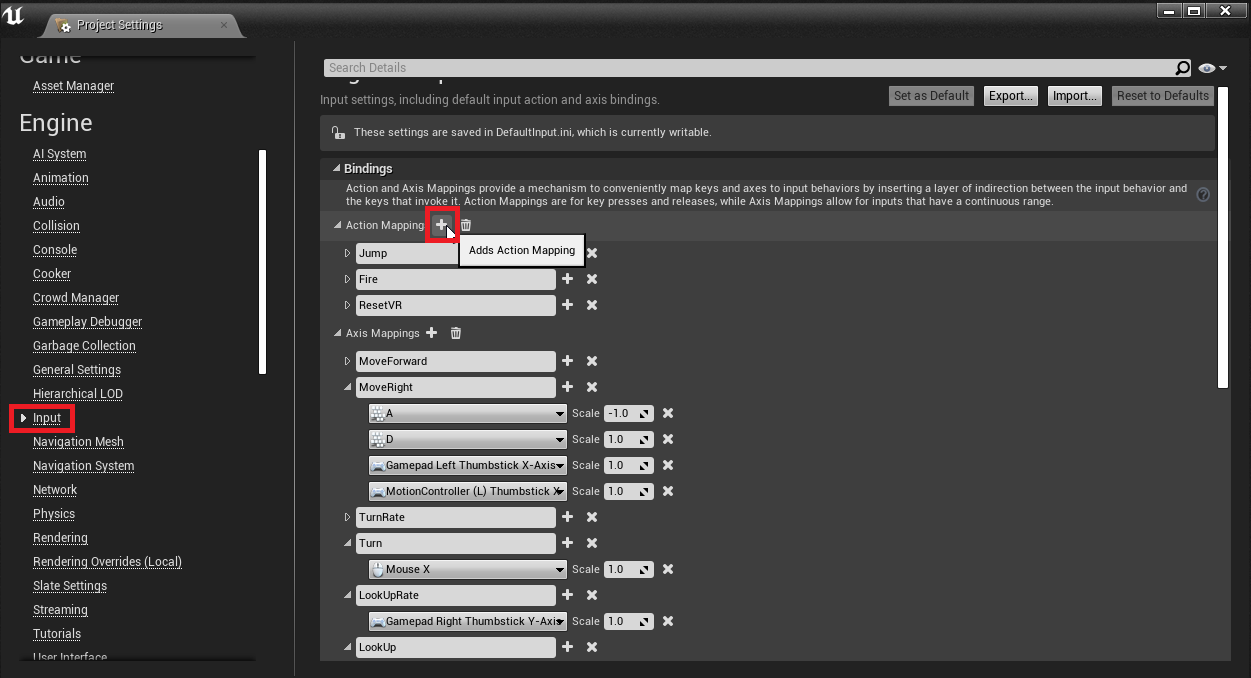
23. On the Project Settings window, navigate to the Input section and add a new Action Mapping. These are key binds.
24. Name it Pause and set the key to whatever you want your pause button as. I used P.
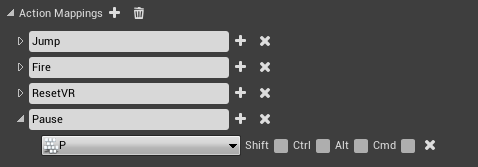
Now, we’re all done in this file. Compile and Save. Let’s go back to the PauseMenu blueprint.
26. At the top right of the PauseMenu blueprint window, click Graph to switch to the event graph.

27. The Resume function is very easy, and since our code from the Exit button is still there, we can just add a little. First, find our existing Exit code.
Note: Since we changed our button variable name, the On Clicked (Button_Exit) has been renamed to On Clicked (Button_Resume).
Now, simply add the node Set Game Paused to the end.
28. Our Main Menu button is a little different. For this, we need to Cast to FirstPersonCharacter. What this means is we are asking the character to run functions in that Blueprint. We want to ask it to respawn our character, so we cast to the player blueprint and run the Respawn custom event we made earlier:
We’re done! The pause menu is complete and ready to go.
