Difficulty: Beginner
This tutorial will cover the implementation of a basic sprinting system. The player can hold LShift (or another key if you want) and increase their movement speed. This is a standalone tutorial, and does not require other systems for it.
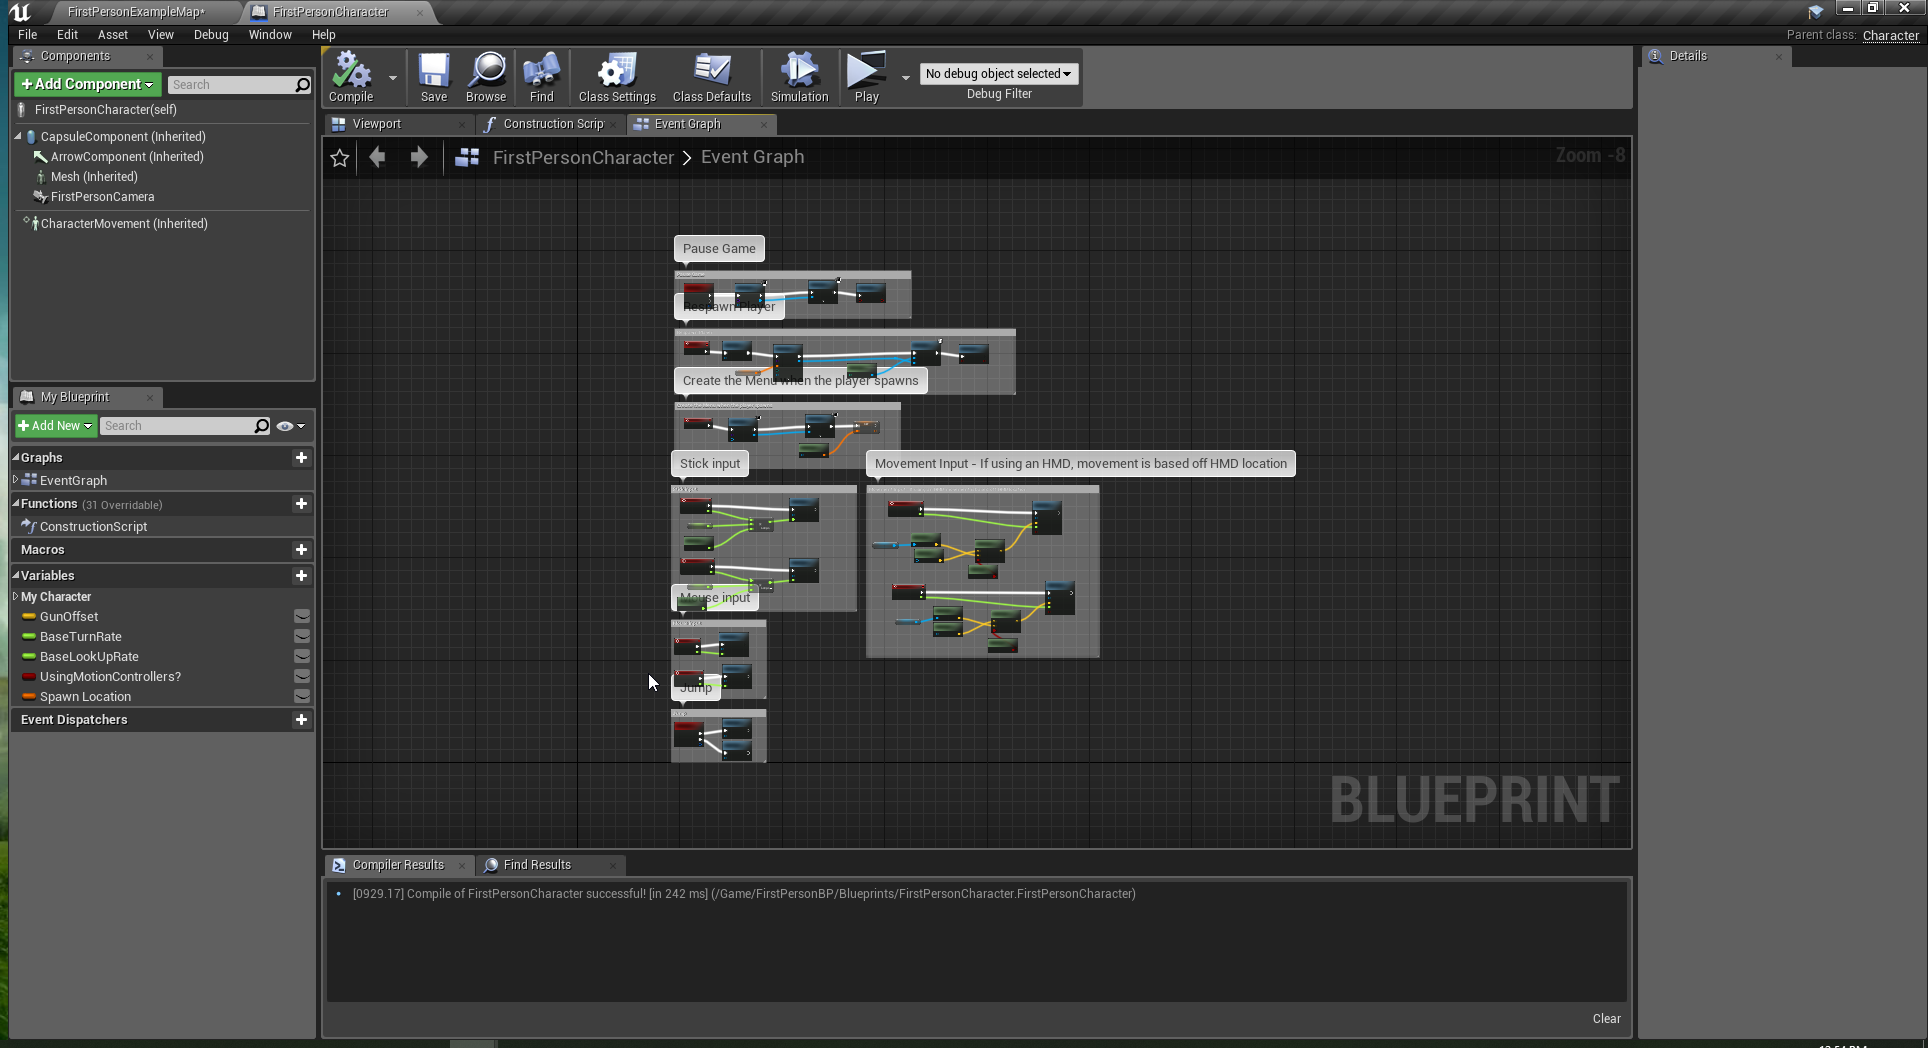
1. First, open the FirstPersonCharacter Blueprint in FirstPersonBP/Blueprints/
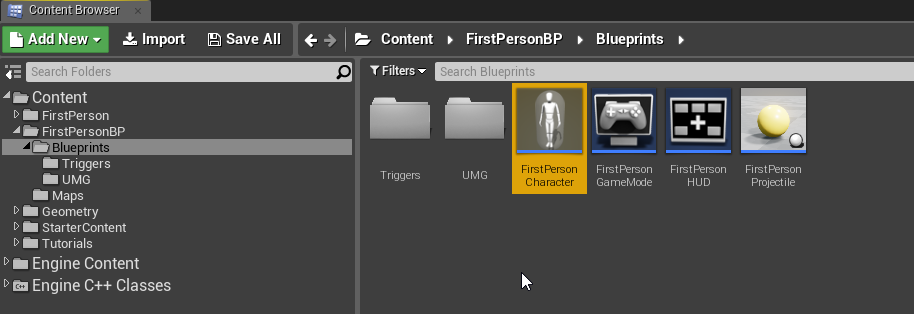
Note: Your Blueprint may look different if you followed other tutorials or added your own stuff. This is a basic one with the addition of the previous tutorials.
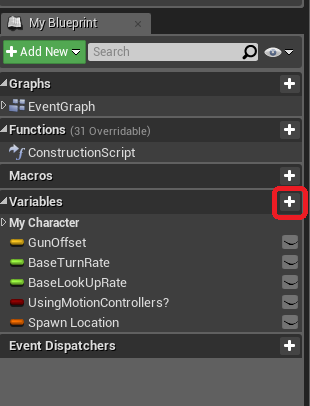
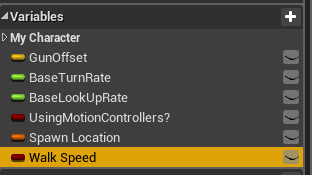
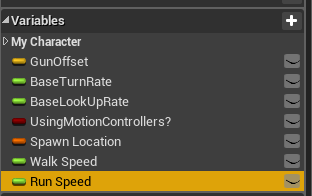
2. There are no defined sprint speeds by default, only a walk speed. We need to create two variables: one for Walk Speed and one for Run Speed. On the left panel titled My Blueprint, there is a section called Variables. Let’s create our first variable, Walk Speed. Click the + next to Variables, and call it Walk Speed. Once you’re done naming it, hit enter.
Tip: The colored line next to the variable name indicates what type of variable it is. Red = Boolean, Light Green = Float, Orange = Transform, etc.
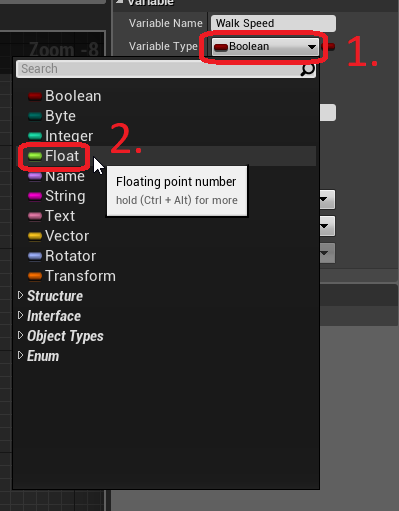
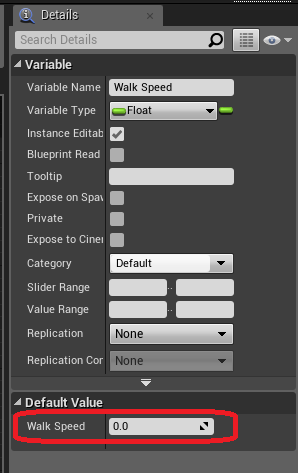
3. Now let’s edit our variable’s details. On the right panel called Details, you can see all the info about the variable.
We need to change our variable from a Boolean to a Float, because it’s a number rather than true/false. Unreal’s variable for run speed is a float, so let’s make it the same type.
Tip: Floats are numbers that can contain decimal points, while integers are whole numbers. They can be converted from one to another in Unreal, but they will lose the decimal numbers if you convert it to an Integer.
4. Now we need to change the default value. In order to change variable default values, the blueprint has to be Compiled and Saved. At the top left of the entire Blueprint window, click Compile and Save.
5. Since we just compiled, we’re allowed to change the Default Value of the variable. We can change these any time during gameplay, but this is the starting value. Back on the bottom of the Details panel, the value is exposed. I changed the default value to 380.0, but this is a trial and error type deal.

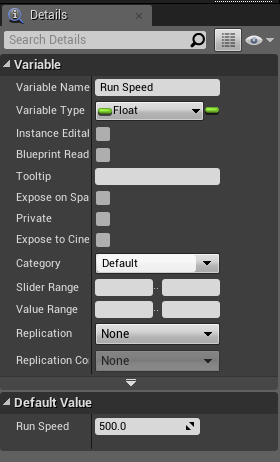
6. Now let’s do this process again for our second variable, Run Speed. Since the most recent variable we made is a float, new variables will be floats as well (unless you change the type). This means we don’t have to change the type, we can just Compile and Save, and change the default value. I chose 500. If this is too slow, you can change it at any time.
7. Now we need to add a keybind for the Sprint event. At the top, click Edit -> Project Settings. This will open the menu with all of the settings for this project specifically.

8. Let’s add a Sprint keybind. First, go to the Input category on the left category list. Click the + on the right of the Action Mappings dropdown. Name the new bind Sprint, and under that select a keybind. I’m choosing Left Shift, but it can be anything.
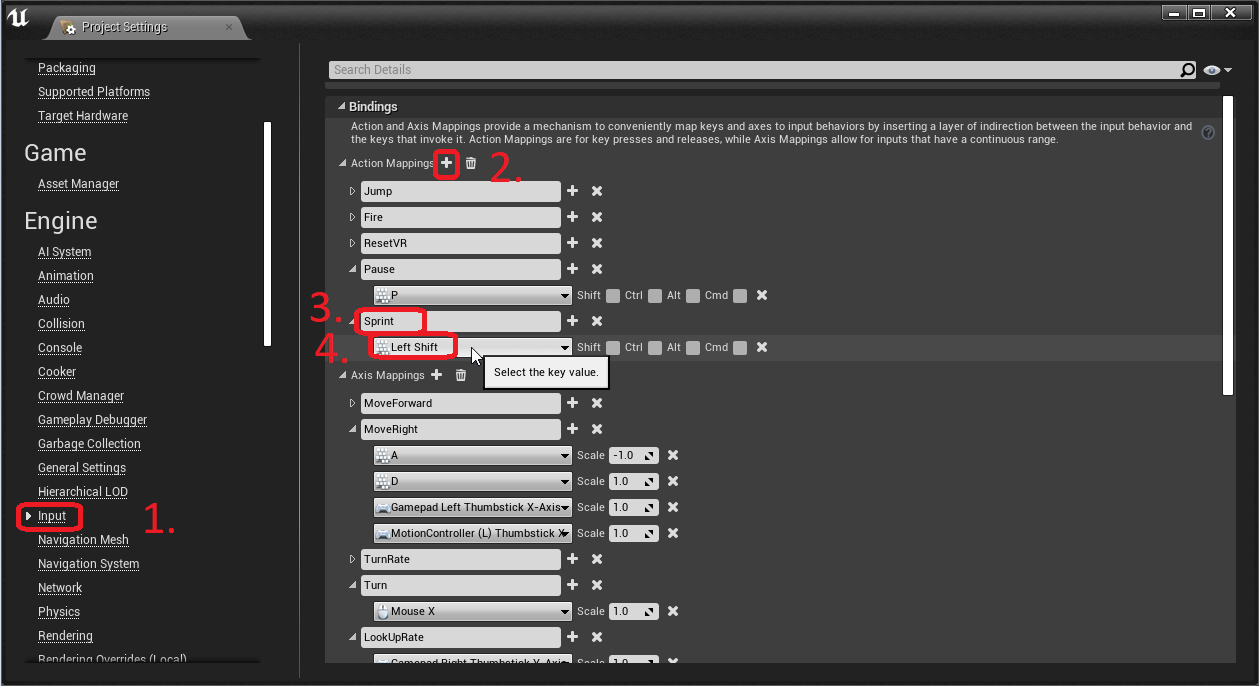
The project settings are saved when you change things, so you can close this window now.
9. Now we need to add some code at the end of our Begin Play event in the FirstPersonCharacter Blueprint.

The Begin Play node is run when the player’s character spawns in, so usually when the game starts. If there’s no player, this will not run.
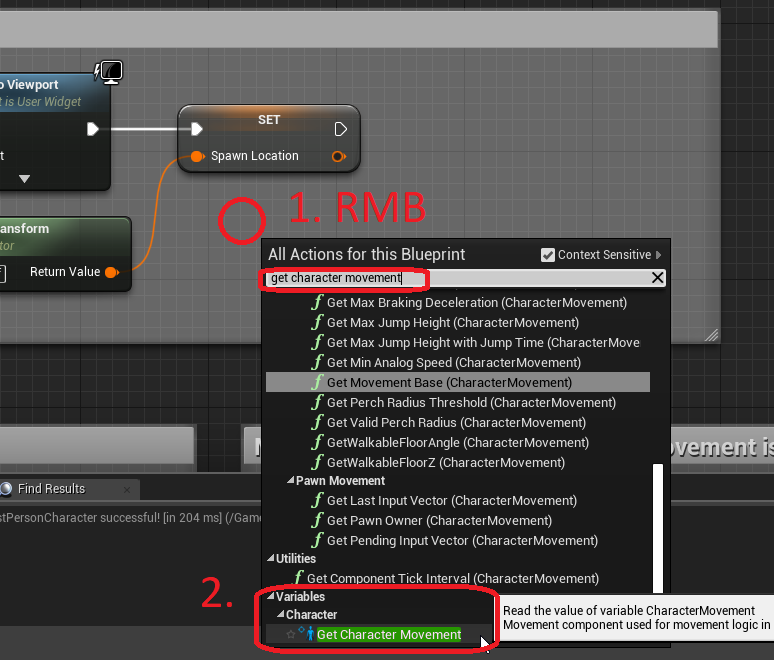
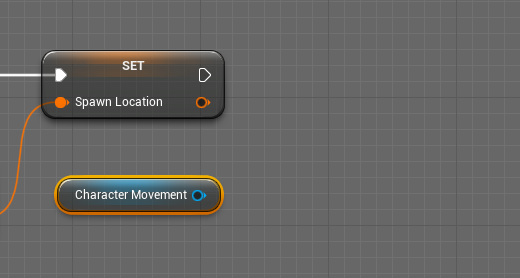
Right click on the Event Graph and type Get Character Movement. Scroll down to the bottom of the list and select the one with the blue person next to it.
10. Click and drag from the output of the blue Character Movement variable node we just made, and type in Set Max Walk Speed. This will create the node and automatically connect it to the variable. Then, attach it to the end of the last node on the Begin Play event.
11. Click and drag our Walk Speed variable from the My Blueprint panel on the left onto the Set Max Walk Speed node input.
12. As of now, we have added these highlighted nodes.
Now, when we start the game, our character will be moving at the speed we defined earlier in the Walk Speed variable
13. Now that the walking is done, it’s time to add the Sprint event.
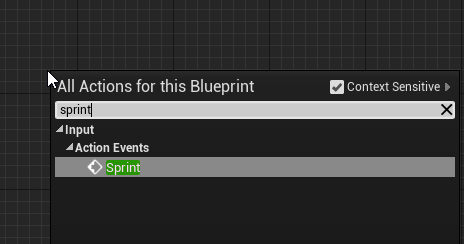
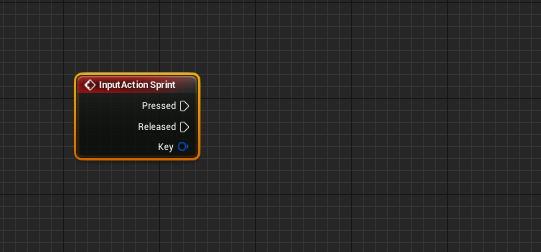
Right click in a new area and add the Sprint input action by searching Sprint.
14. Now, add the Get Character Movement variable node like we did before in step 9.

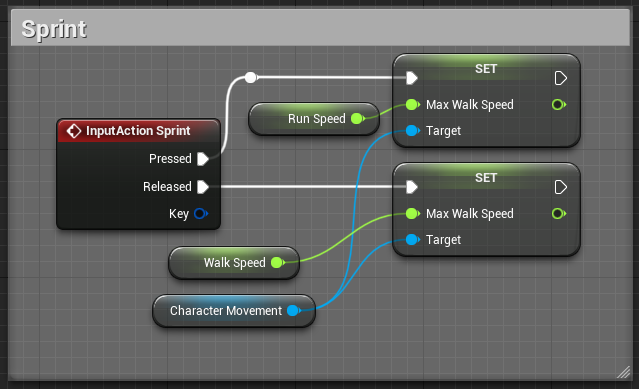
15. Drag off the Character Movement variable output and a Set Max Walk Speed node, like in step 10. Connect our Walk Speed variable to the input, like step 11. Connect Set Max Walk Speed node to the Released output on the InputAction Sprint.
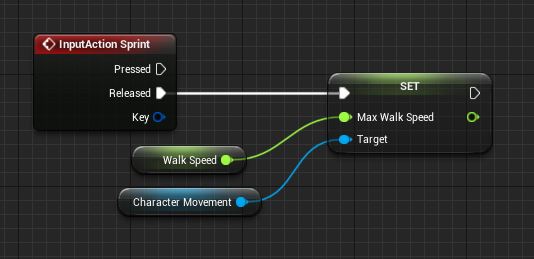
16. Do the same for the Pressed output on the InputAction Sprint, but connect our Run Speed variable to it instead. This is our final Sprint Event
Tip: You can double click on any wire to add a reroute node, allowing you to organize the lines better. I did this on the Pressed white wire.
Nice job, you’re done! The sprint system is all done now.
For this demonstration, I made the run and walk speeds more extreme, Walk = 250, Run = 800. I also added debug Print nodes to output when sprint is pressed.
