Difficulty: Intermediate
This tutorial will cover implementing a basic lock and key system. The player can find a key, walk up to a lock, and use the key on the lock to delete the barrier. The lock can enable/disable consuming the key on interact, to reuse the same key for multiple locks. This tutorial will also optionally implementing using the key with the door system from the previous tutorial.
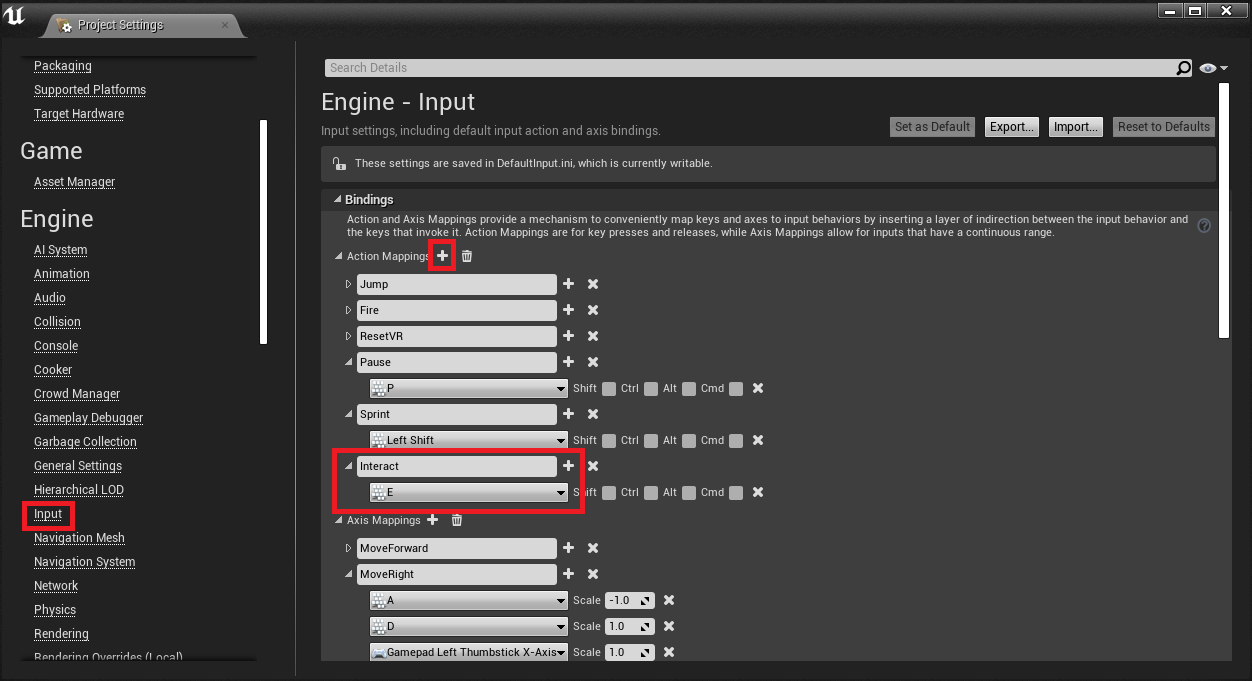
1. First, we need to add the keybind for the interact button and line trace. If you followed the previous door tutorial, you will already have this, so skip to step 4.
I will use E as my key, but it can be whatever you want.
At the top of the editor, click Edit -> Project Settings. This will open the menu with all of the settings for this project specifically.

2. Let’s add the keybind now. First, go to the Input category on the left category list. Click the + on the right of the Action Mappings dropdown. Name the new bind Interact, and under that select a keybind. I’m choosing Left Shift, but it can be anything.
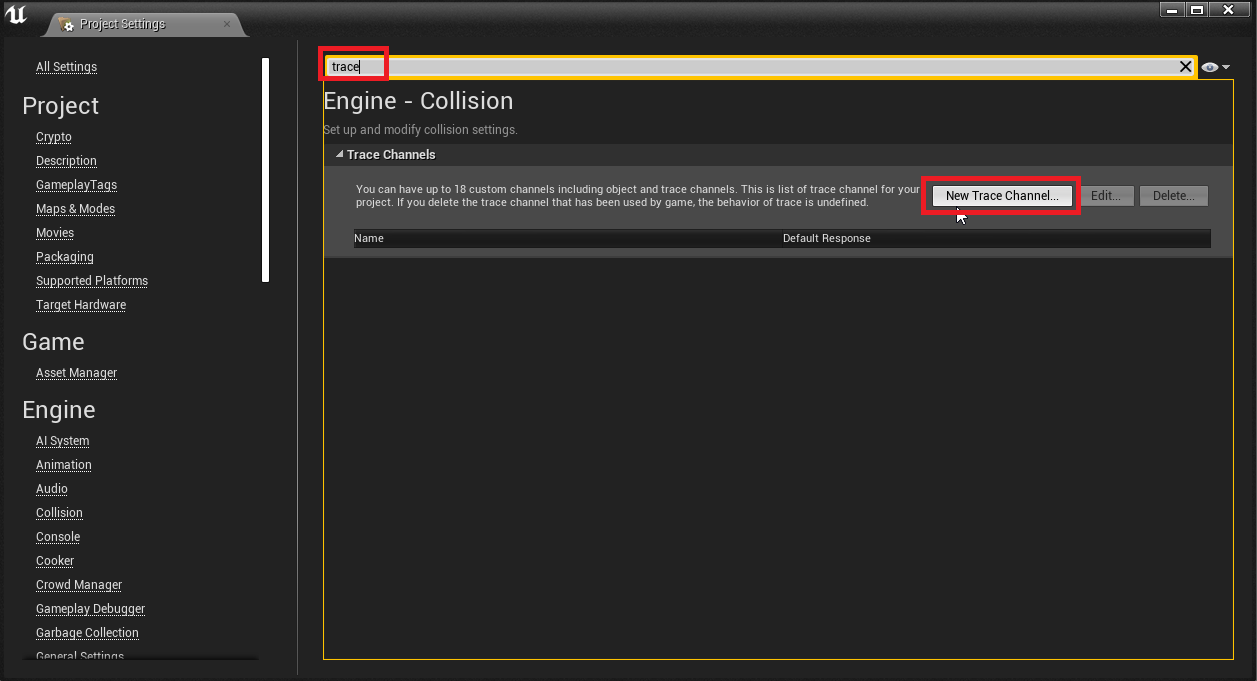
3. When the player presses the interact keybind, we need to filter for specific object types. We need to add a separate trace channel for interaction. When we draw the line, we can search specifically for the actors with this trace channel. Search for “trace” at the top to narrow down the results.
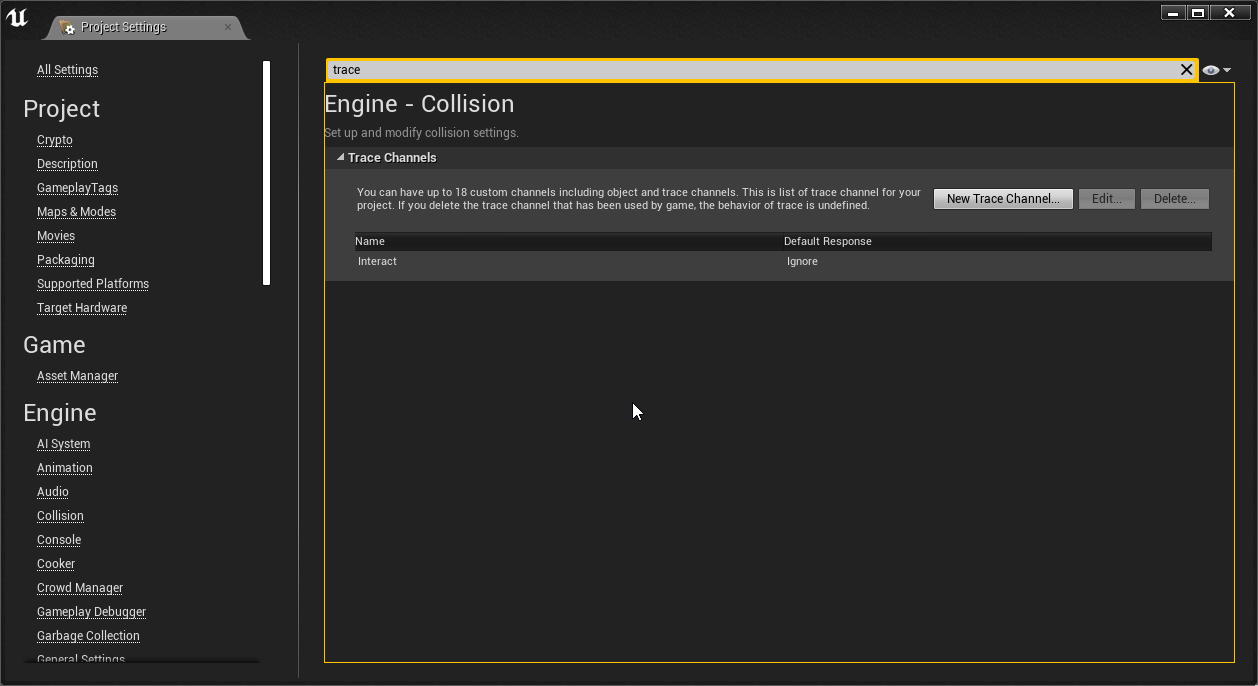
Now, click New Trace Channel to open our trace channel creation menu. Set the name to Interact, and set the Default Response to Ignore. Then, press Accept to confirm our creation.
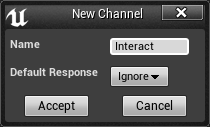
The project settings are saved when you change things, so you can close this window now.
4. We need to add an array to keep track of what keys we have. Open the FirstPersonCharacter Blueprint in FirstPersonBP/Blueprints/

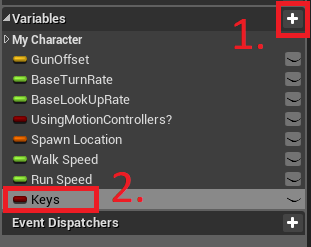
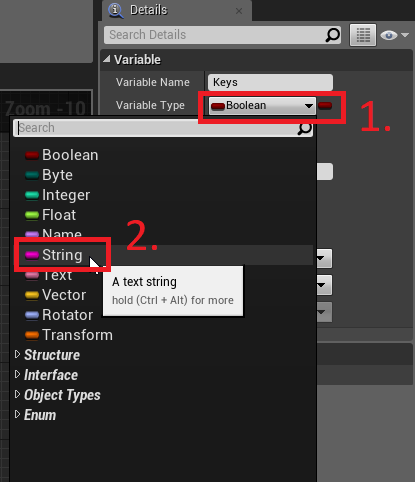
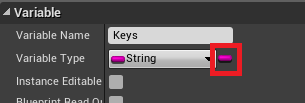
5. On the My Blueprint panel, add a variable called Keys, and change its type to String.
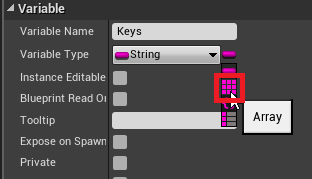
6. We want the keys variable to be an array, so we can store a bunch of them. Click the container button to the right of the variable type, and select the grid of squares. This grid represents an array.

Compile and Save.
7. Now we will create the actors. First, let’s make a simple barrier fence for this tutorial. Create a new Actor Blueprint titled BP_Interact_Barrier. I put mine in FirstPersonBP/Blueprints/Actors/

Now, open the Blueprint.
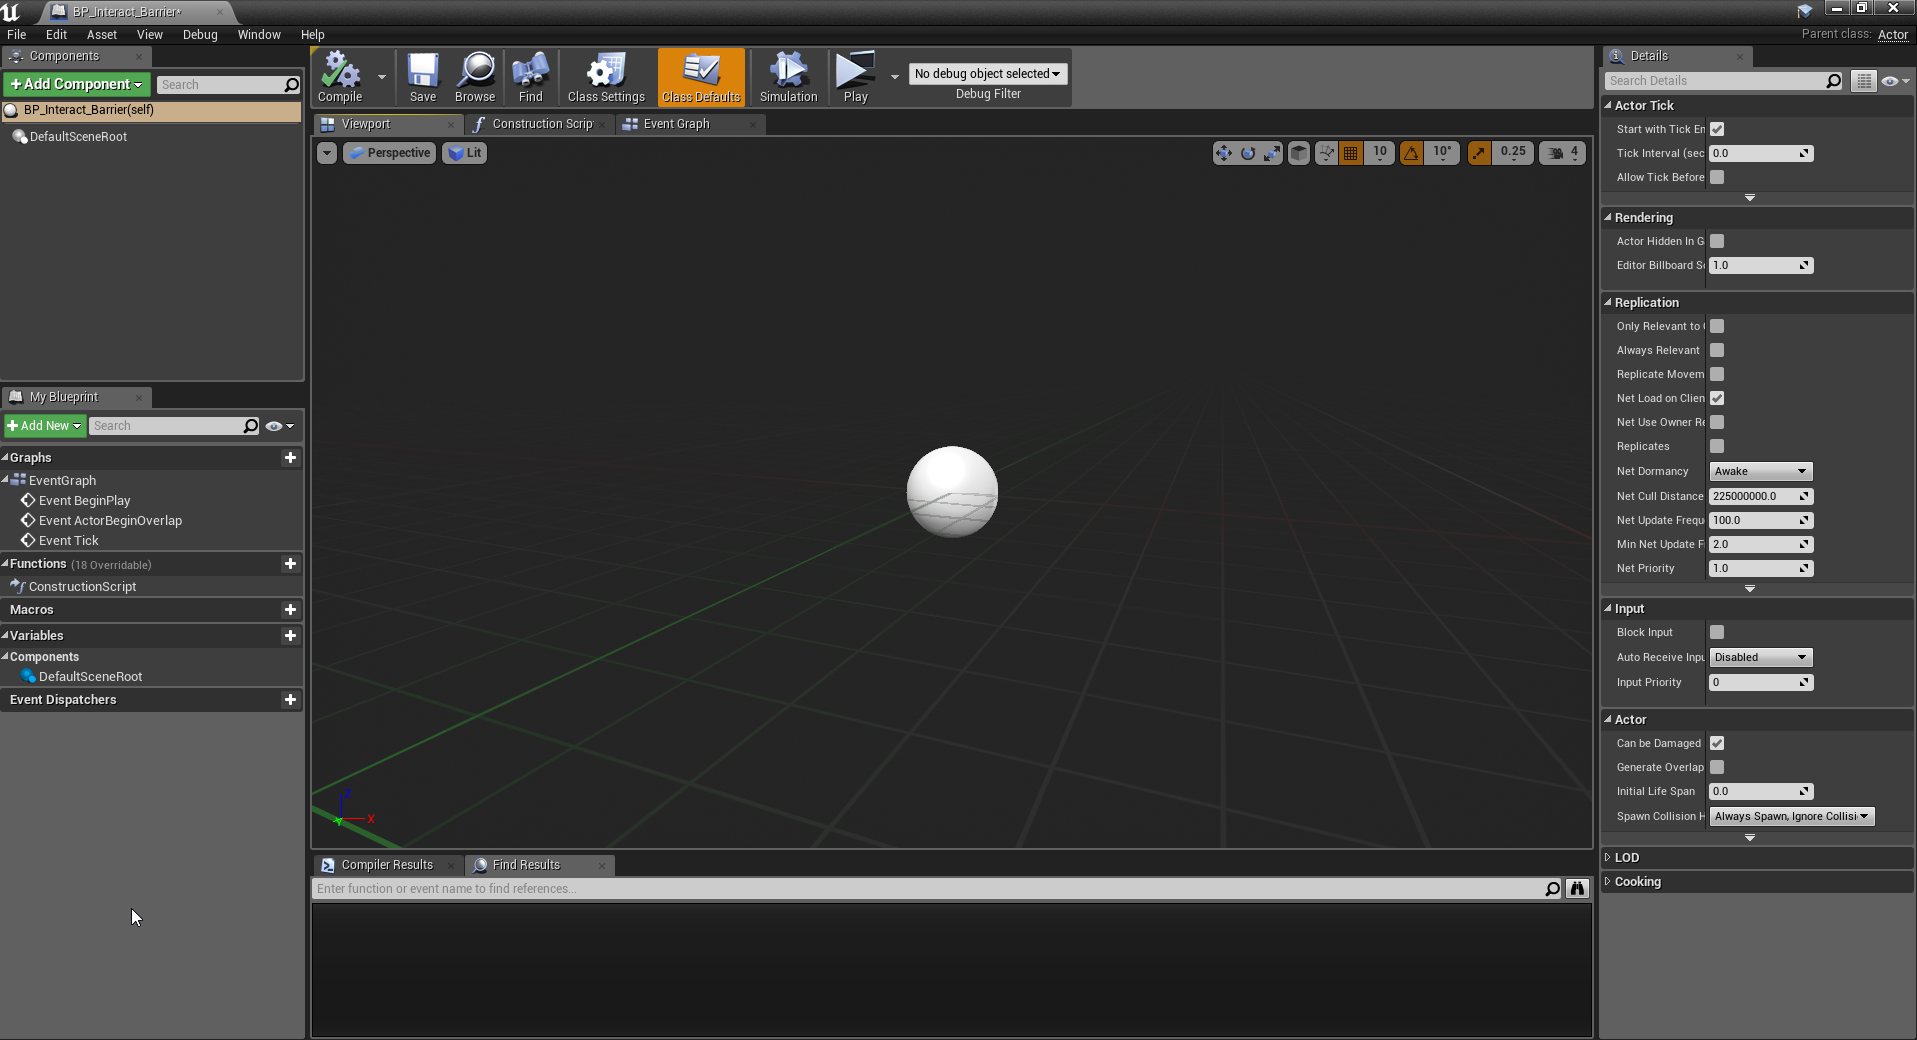
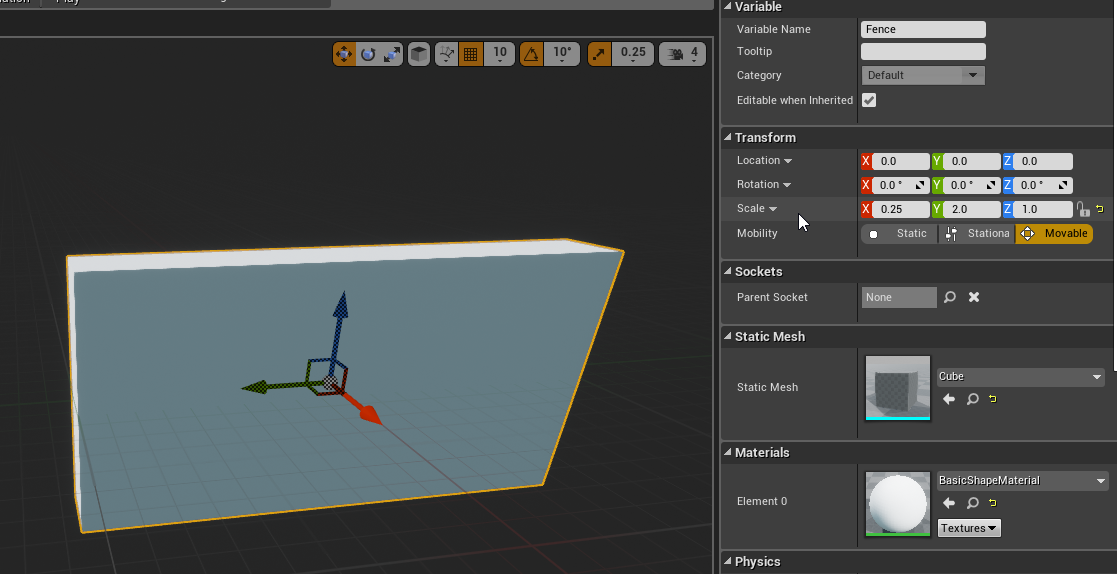
8. Let’s add our version of a fence, which will simply be a rescaled cube. To add a cube to our actor, click Add Component -> Cube at the top left on the Components tab. Call it Fence.
9. Rescale the Fence on the Details panel on the right. I used:
X: 0.25
Y: 2
Z: 1
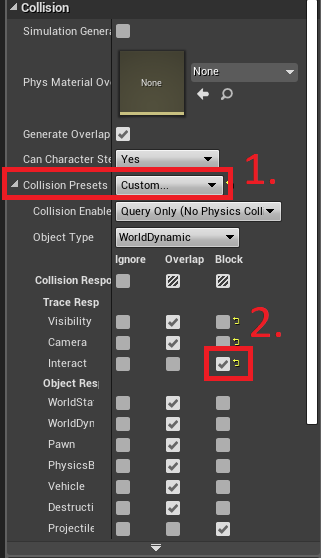
10. With the fence still selected, scroll down to the Collision section, and change the Collision Preset to Custom. Under the Trace Responses, change Interact to Block.
11. Now, we’re going to make a variable that determines what the key is called. Add a variable called Key Name, and change its type to String.
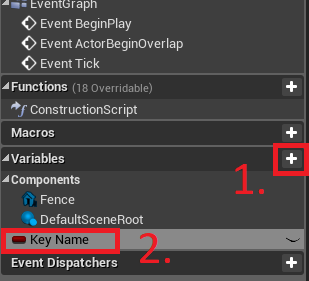
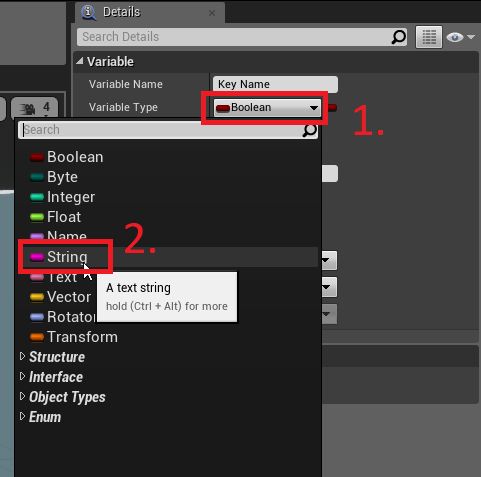
Changing the variable to a String will change the color to pink on the Variables list.

12. Add another variable titled Consume On Interact, and change its type to Boolean.
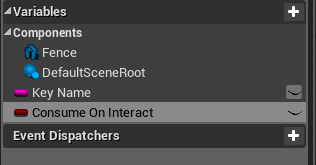
13. Enable Instance Editable on the variable by pressing the closed eye on the variable name. This will change the icon to an open eye.

An open eye on a variable lets use change the variable on the actor in the level, and only affect that one actor.
This will let us pick if the key is eaten when we interact with the barrier.
14. Make the Key Name variable editable as well.
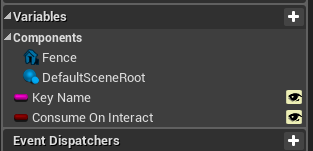
Compile and Save.
15. With the Key Name variable selected, on the Details panel change the Default Value to key1.

Again, Compile and Save.
16. Now, let’s add a custom event that runs when we interact with the fence. Right click in the event graph and type Add Custom Event. Name it On Interact.
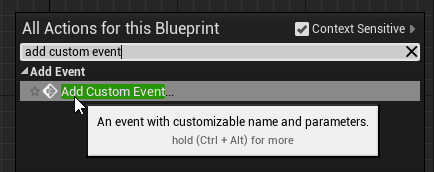
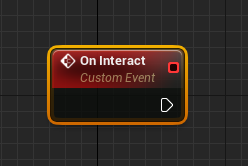
17. In the custom event, cast to the FirstPersonCharacter, and get the Keys variable.

18. Connect the Keys variable to a Contains node, and have it check for the barrier’s Key Name variable.
19. Connect that Contains node to a branch, and connect the branch to the Cast node.

At this point, when the player interacts with the barrier, it will check if the player has the key.
20. Add another Branch connected to the True node, and connect the Branch Condition to this Blueprint’s Consume On Interact boolean variable.

21. Connect a line from the original Keys variable earlier in the custom event to a Remove Item node. Connect the output to a DestroyActor node, and connect the false from the Branch to the DestroyActor node.

22. The whole custom event will look like this:
When this event is run, it first checks if the player has the correct key, and if it does, destroy the barrier. If it should take the key, it takes the key and destroys the barrier.
23. Now, let’s create the Key actor. Create a new Actor Blueprint titled BP_Interact_Key. I put mine in FirstPersonBP/Blueprints/Actors/

24. Like before, create a variable called Key Name and change the type to string. Click the eye on the right of the variable so it’s open.
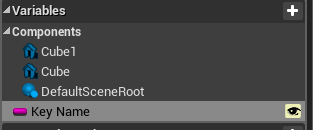
25. On the details panel, change its default value to key1

26. Next, onto the model. I combined several cubes to make a basic key.
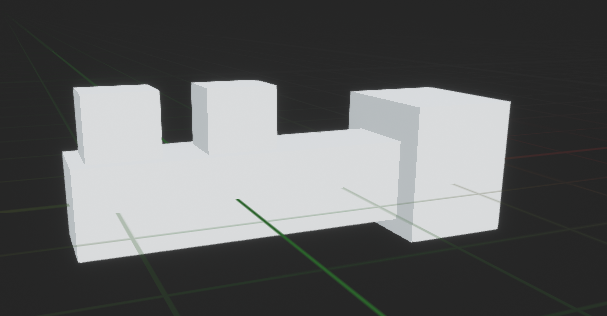
26. Instead of changing every cube’s collision to accept the interaction, we will add a Box Collision Component, and rescaled it to be around the whole key.
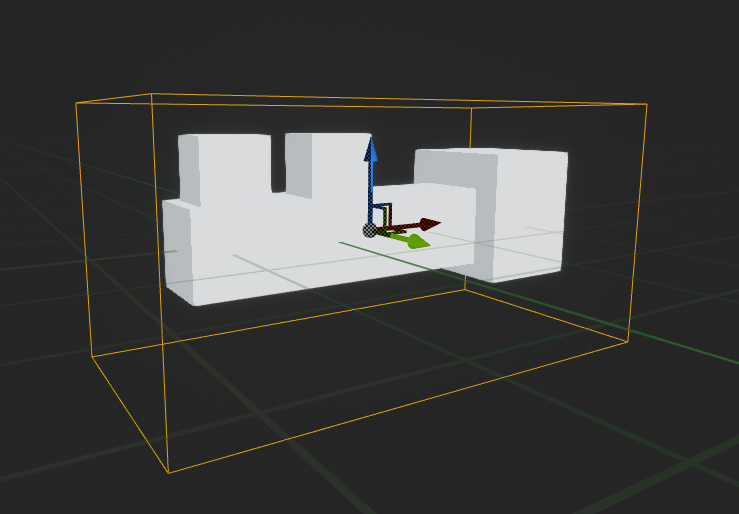
27. Like before, change the Box Collision‘s presets to Custom and change the Trace Response for Interact to Block.
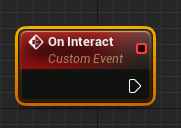
28. In the Event Graph, create a Custom Event called On Interact
29. Cast to the FirstPersonCharacter and get the Keys array variable.

30. Get the Key Name variable from this Blueprint, and add it to the player’s Keys array. After, add a DestroyActor node.
We’re finished with the Key actor!
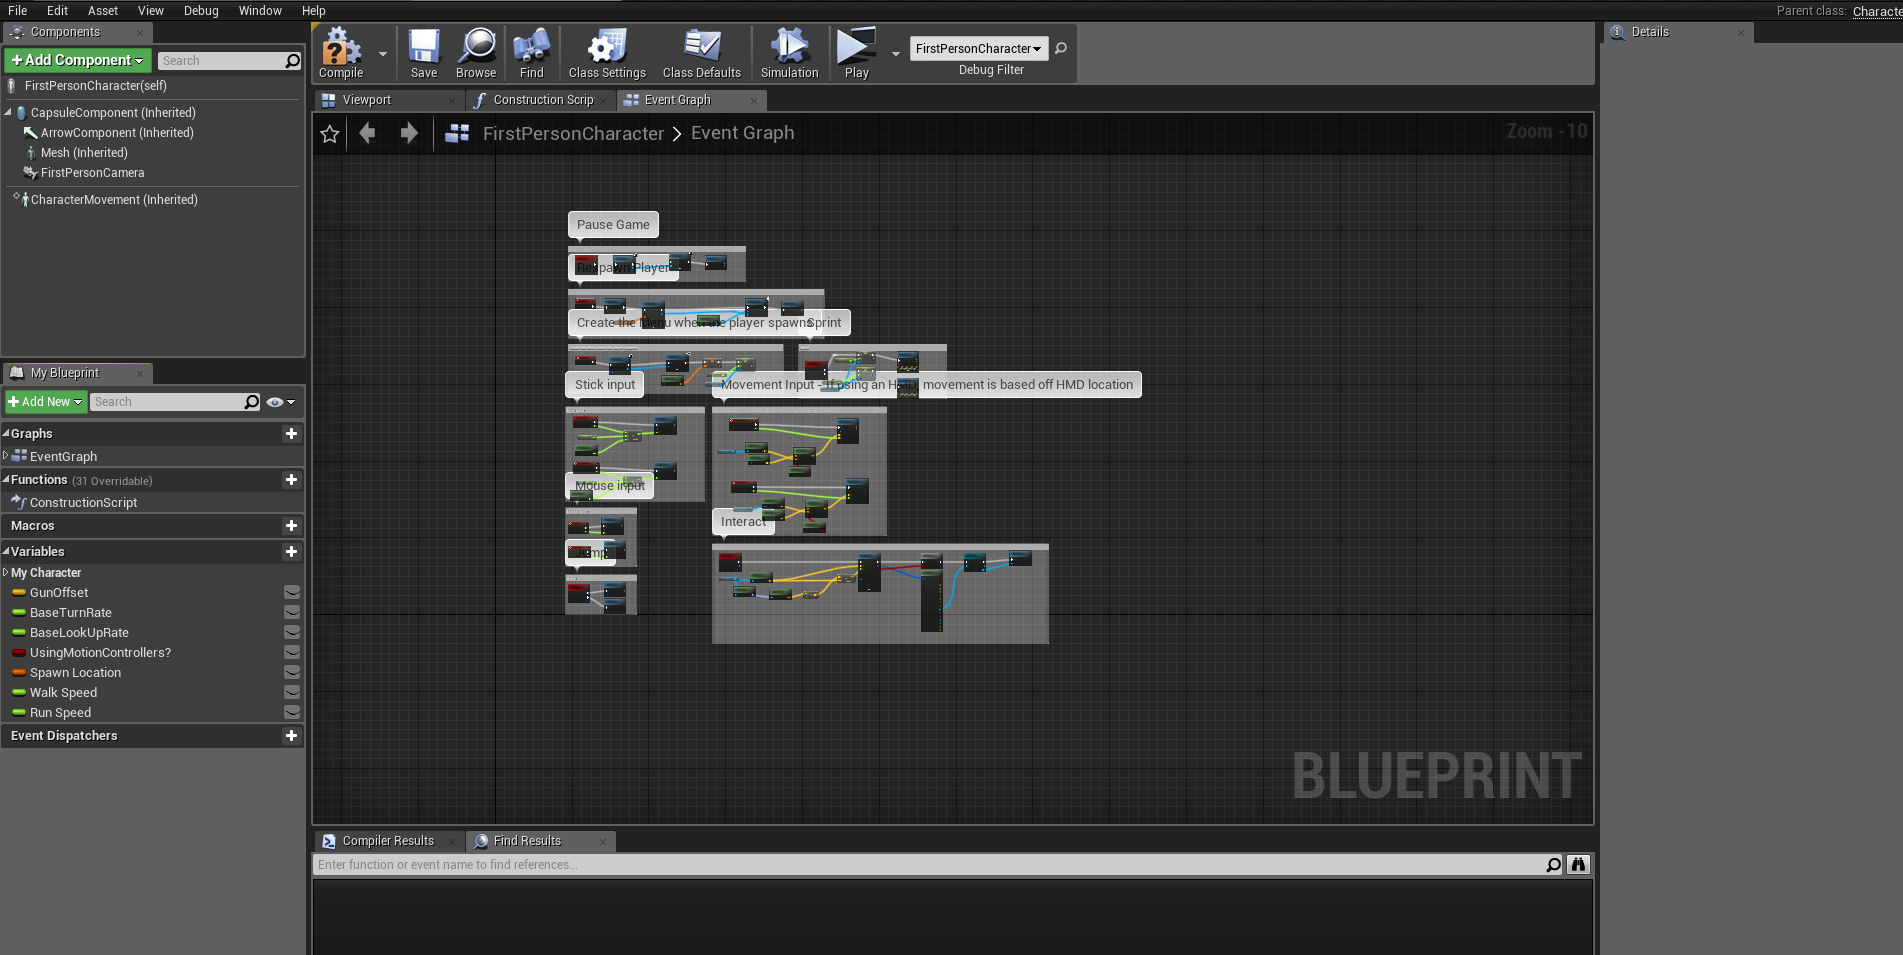
31. Now, back to the FirstPersonCharacter Blueprint in FirstPersonBP/Blueprints/

32. If you followed the Door Interaction tutorial, skip to step 37. Delete the nodes after the Line Trace check Branch and continue from there.
In the Event Graph of our Character blueprint, add a node for our InputAction Interact.
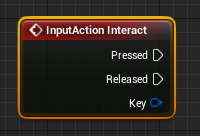
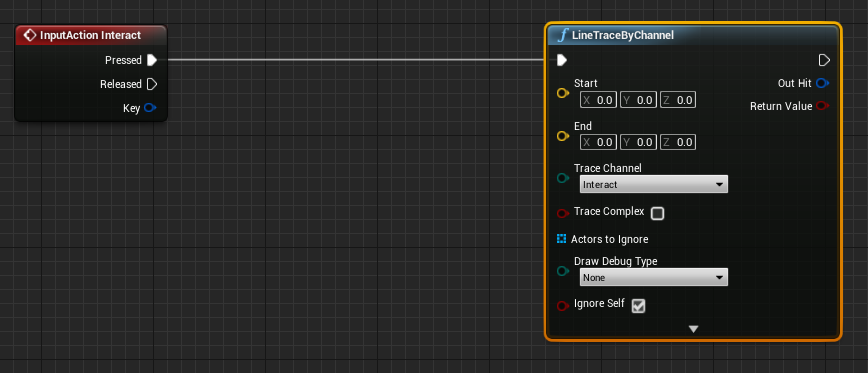
33. Connect a Line Trace By Channel node, and connect it to the InputAction’s Pressed output. Change the Trace Channel to Interact.
34. Drag the FirstPersonCamera from the Components panel to the Event Graph. Connect the output to a Get Actor Location and Get Actor Rotation.
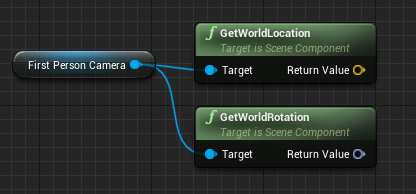
35. Connect a Get Forward Vector to the Get World Rotation node, and multiply it by 500.

36. Connect the Get World Location to the Start on the Line Trace, as well as a Vector + Vector node. Add the x500 multiplication to the + vector, and connect that to the End on the Line Trace.

36. Now let’s check if the line trace hits something before it does stuff. Add a Branch on the output of the Line Trace at Return Value.
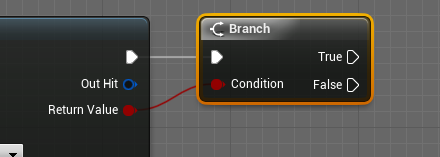
37. Connect the Out Hit output to a Break Hit Result node. Connect a GetClass node to the Hit Actor output.
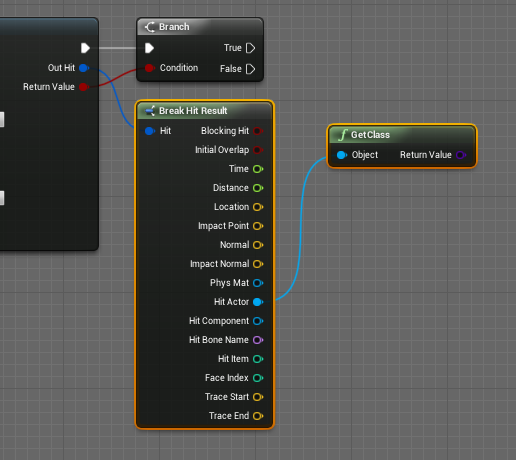
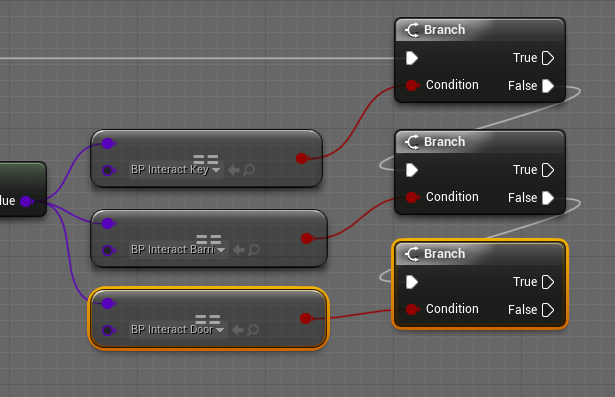
38. Connect an == to the GetClass, and connect the output to a Branch. Change the Class on the == node to BP_Interact_Key. This checks if the Line Trace hits the key, and runs the branch if it does.

39. Connect another == and Branch for BP_Interact_Barrier connected to the False output on the Branch.
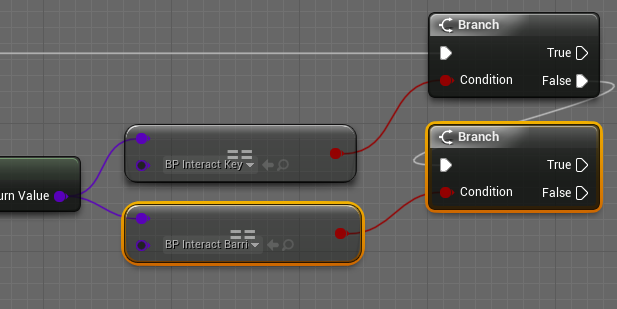
40. If you followed the previous Door Interact tutorial, add a third == for the Door. Otherwise, skip to step 41.
41. Cast to each Actor we’re checking for by connecting from Hit Actor to a Cast To node.
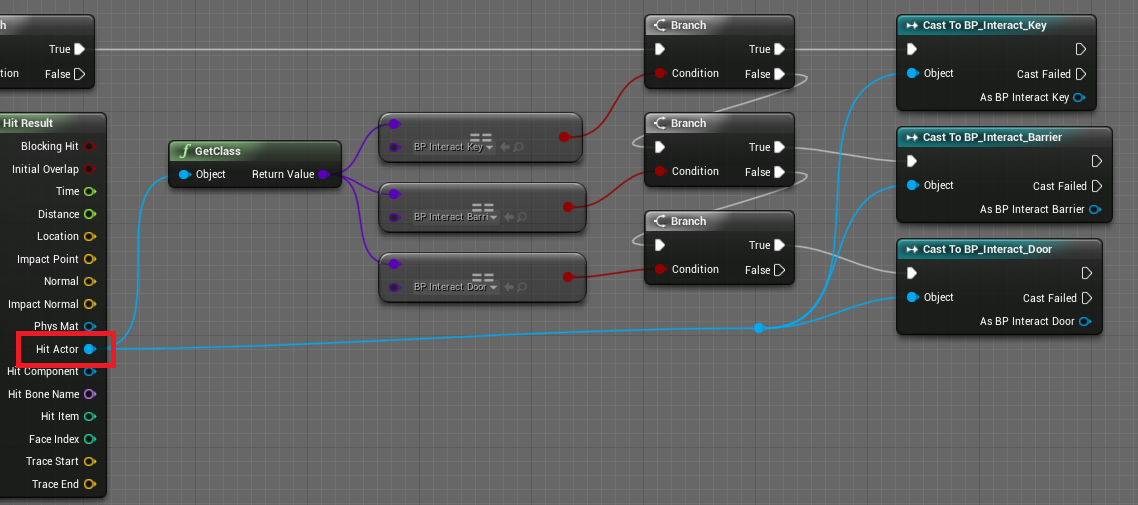
Tip: After connecting a wire to a Cast node, double click it to add a reroute node from easier organization.
42. Run each Interact event by connecting to the output of the Cast node.
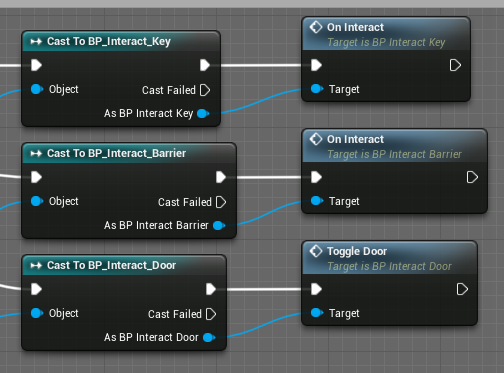
43. We’re done! The event should look like this now:
Make sure to Compile and Save.
44. You’re done!
You can drag barriers and keys into the world, and they will automatically be connected. Make sure to change the IDs of keys and barriers to match on the Details panel when the key or barrier is selected. Otherwise, all keys and barriers will be linked.
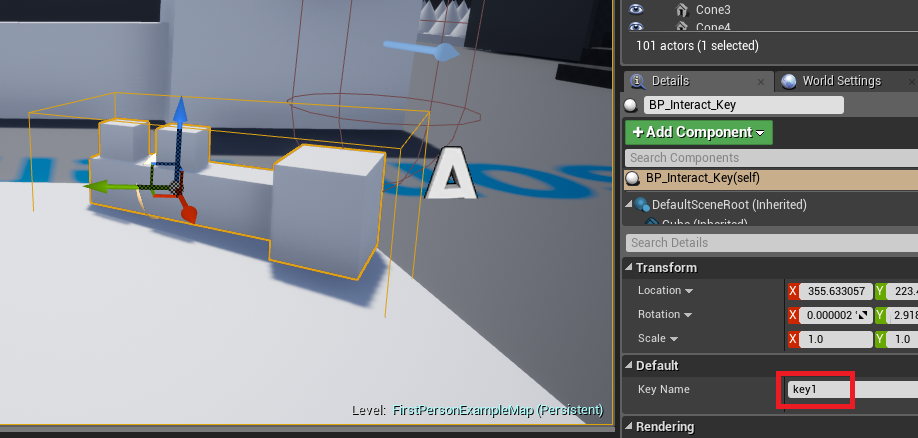
Key Selected with ID key1

Barrier Selected with ID key1
