Difficulty: Intermediate
This tutorial will cover the implementation of a basic door interaction system. The player can press a key to toggle a door open or closed.
1. First, let’s make a new keybind for opening doors. I will use E as my key, but it can be whatever you want.
At the top of the editor, click Edit -> Project Settings. This will open the menu with all of the settings for this project specifically.

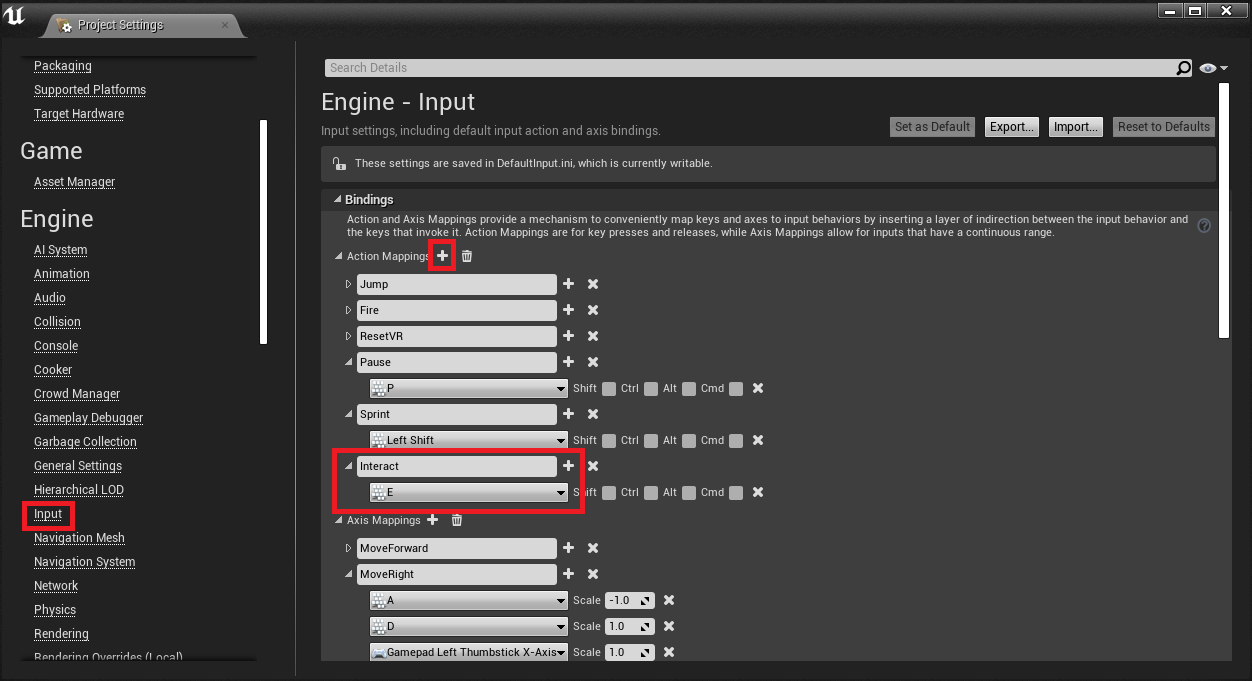
2. Let’s add the keybind now. First, go to the Input category on the left category list. Click the + on the right of the Action Mappings dropdown. Name the new bind Interact, and under that select a keybind. I’m choosing Left Shift, but it can be anything.
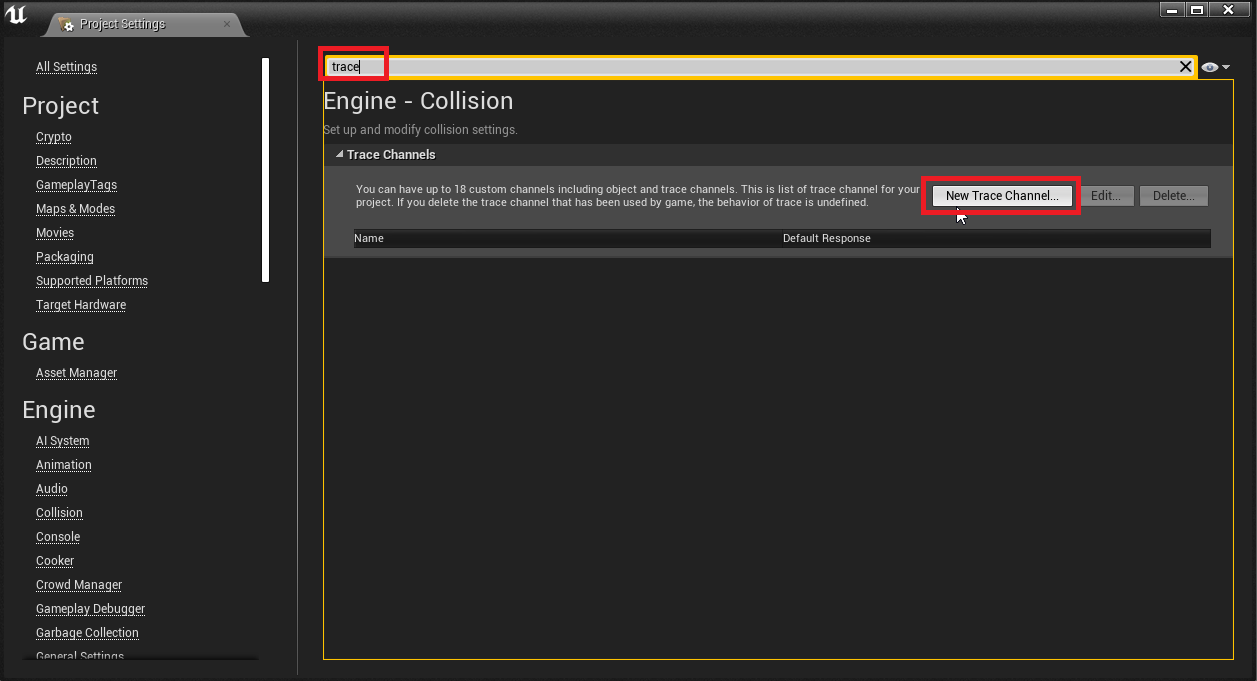
3. When the player presses the interact keybind, we need to filter for specific object types. We need to add a separate trace channel for interaction. When we draw the line, we can search specifically for the actors with this trace channel. Search for “trace” at the top to narrow down the results.
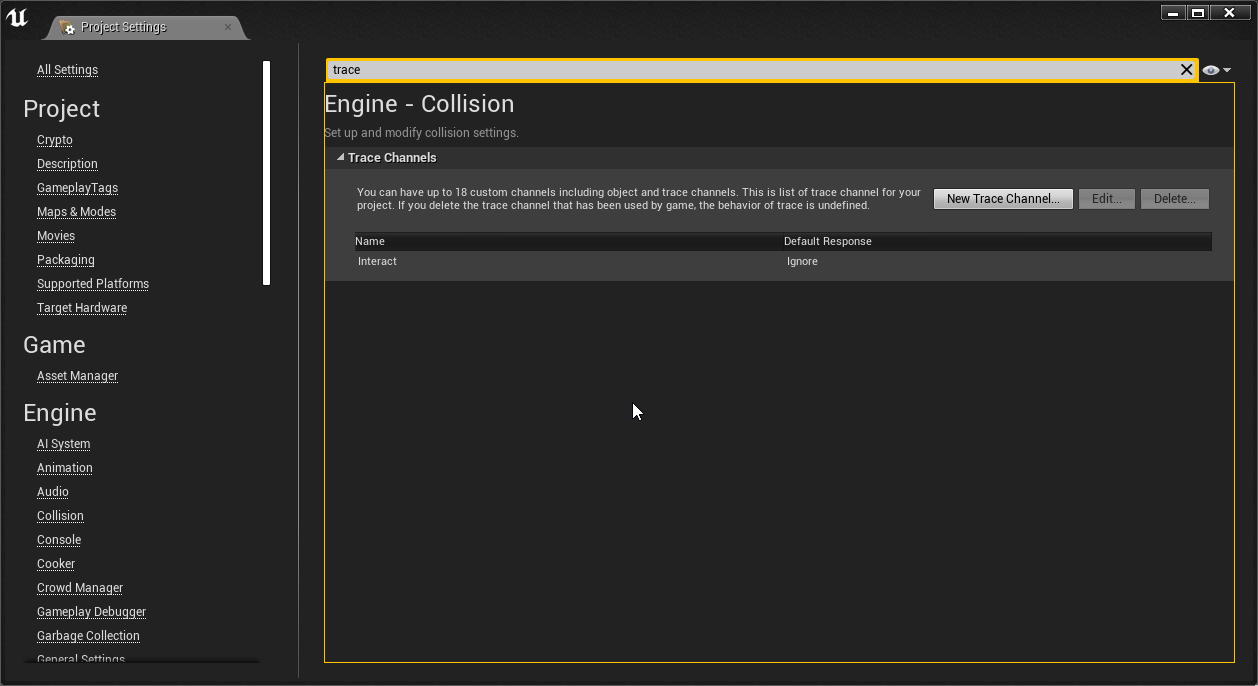
Now, click New Trace Channel to open our trace channel creation menu. Set the name to Interact, and set the Default Response to Ignore. Then, press Accept to confirm our creation.
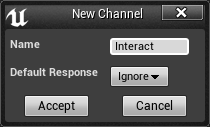
The project settings are saved when you change things, so you can close this window now.
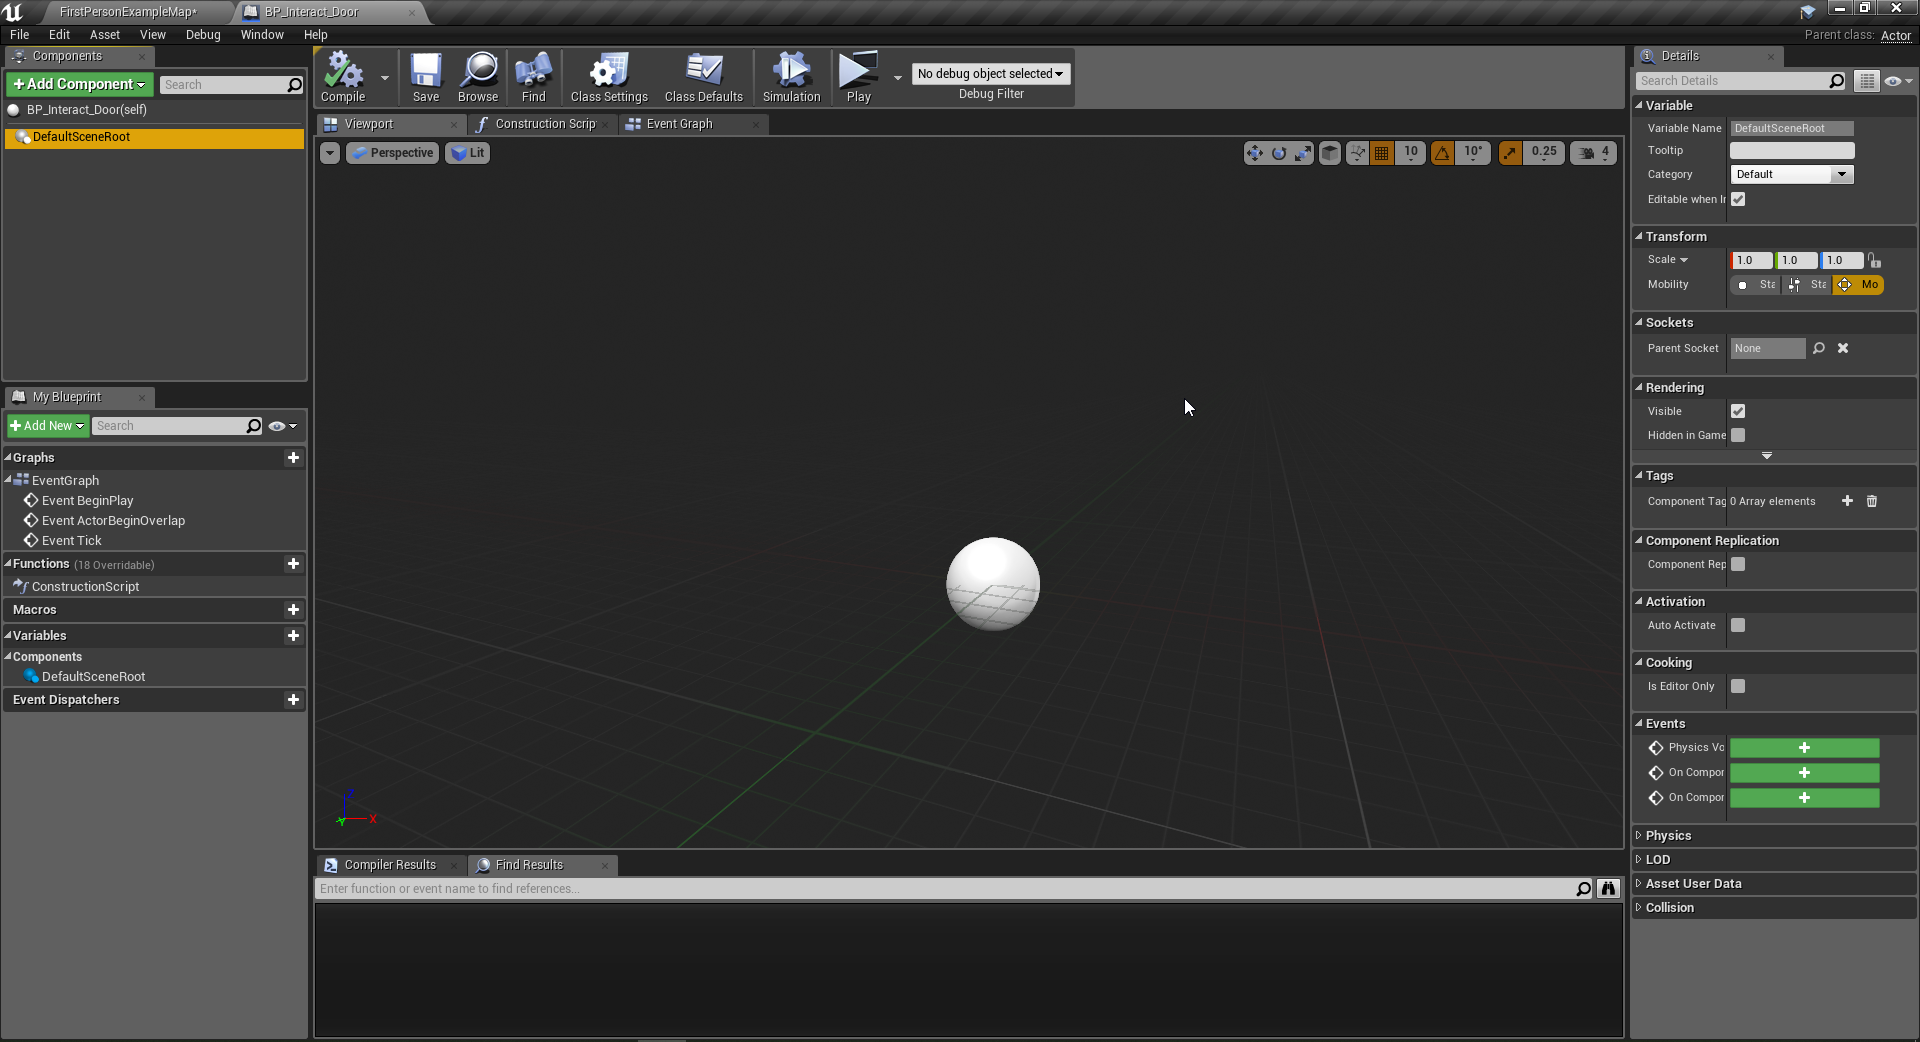
4. Now we have to make our door. Create a new Actor Blueprint titled BP_Interact_Door. I put mine in FirstPersonBP/Blueprints/Actors/
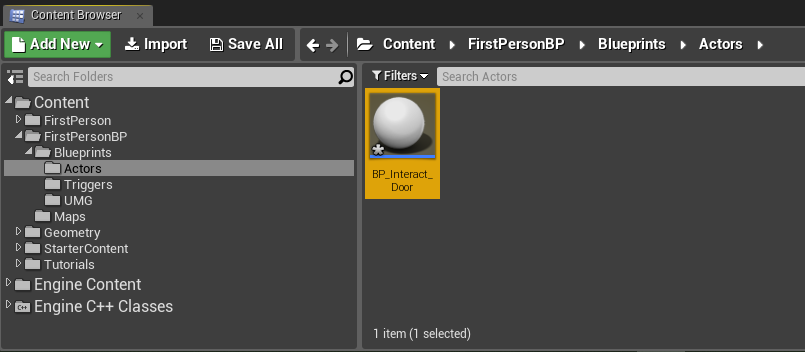
Then, open the Blueprint.
5. We’re going to assume I don’t have an actual door model to use, so I’ll just use a re-scaled cube as a door. To add a cube to our actor, click Add Component -> Cube at the top left on the Components tab. Call it Door.
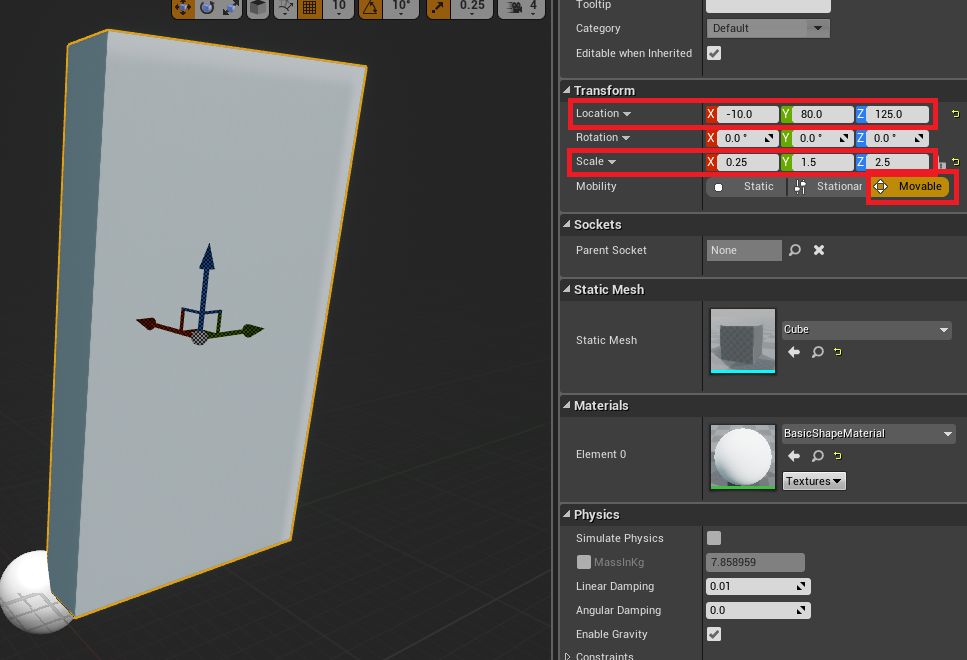
6. We need the cube to be a door shape, so select the Cube, and on the Details panel on the right, change the Scale to X 0.25 Y 1.5 Z 2.5. Make sure the Mobility is set to Moveable or the door cannot rotate.
Set the door location to X -10 Y 80 Z 125. We need to do this so the Actor’s pivot is at the door hinge, rather than the center.
7. With the cube still selected, Scroll down to the Collision section, and change the Collision Preset to Custom. Under the Trace Responses, change Interact to Block.
8. We need to define a start rotation and end rotation for the door. Add a variable called Start Rotation, and change its type to Rotator.
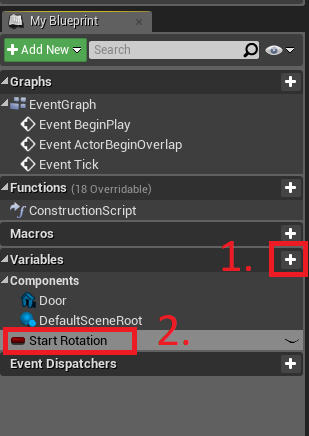
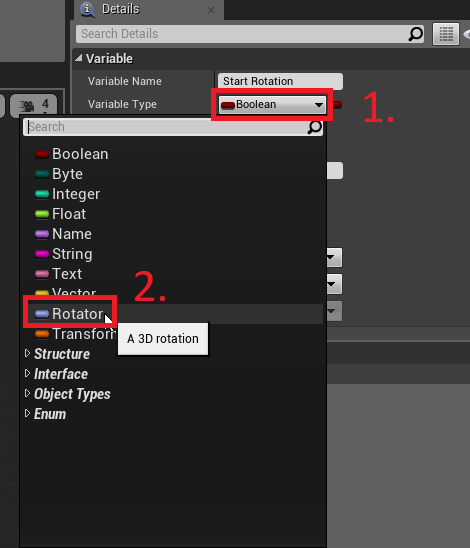
Changing the variable to a Rotator will change the color to purple on the Variables list.

Note: New variables will be the same type as the last created one.
9. Add a new variable and call it End Rotation. It will automatically be a Rotator since we just made the other one.
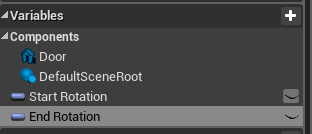
Compile and Save.
10. With the End Rotation variable selected, change the default value’s Z to 90.

Compile and Save again.
11. We need to change the Start Rotation variable. This method will set it in runtime so it adjusts to how the door is placed in the level editor. In the Event Graph, create two nodes for setting each variable by dragging the variable onto the Event Graph and picking the Set __ option. Then, connect the nodes to the BeginPlay node.
12. Connect a Get Actor Rotation to the Start Rotation node. This sets our variable to the starting rotation of the door actor when the game starts.

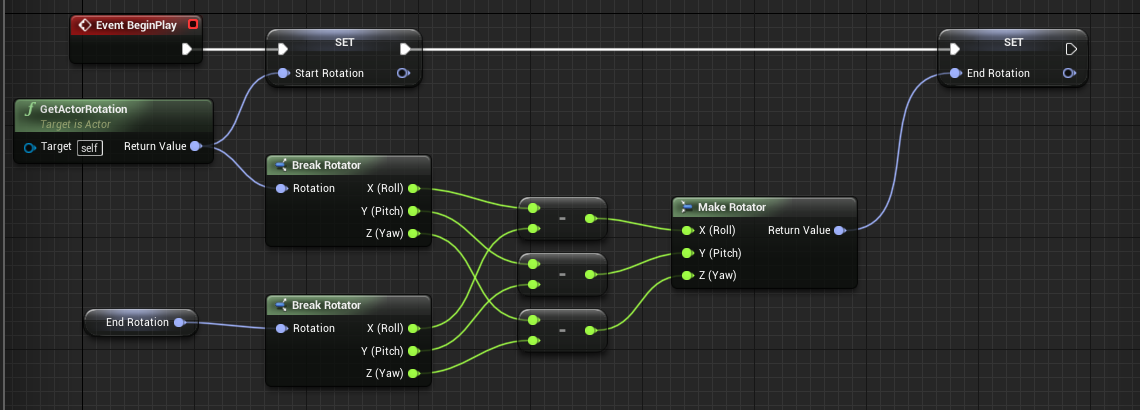
13. We need to subtract our End Rotation variable from the Start Rotation to create our final world end rotation. Unfortunately, there’s no way to subtract two rotators easily, so we have to break the angles and combine them after.
Drag off the GetActorRotation and make a Break Rotator node.
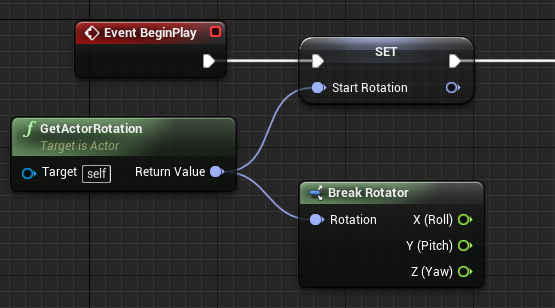
14. Drag in our End Rotation as a Get and break the output of that.
15. Subtract each Ending axis from the Starting one, and combine them together with a Make Rotator node. Connect it to the Set End Rotation node.
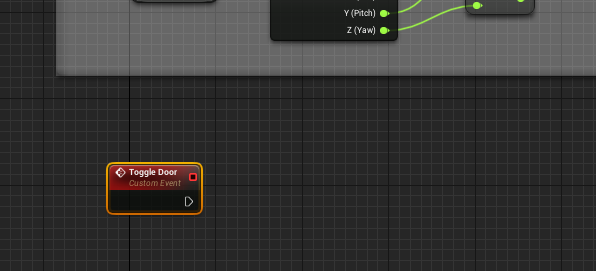
16. Now, we need to create a new Custom Event called Toggle Door.
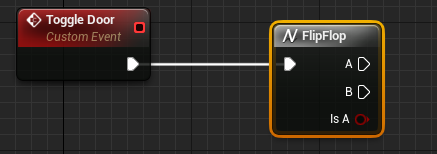
17. Attach a FlipFlop node. This switches between A and B each time it is run.
18. Now, we need to create a Timeline by creating an Add Timeline node. Attach the FlipFlop’s A to Play and B to Reverse.
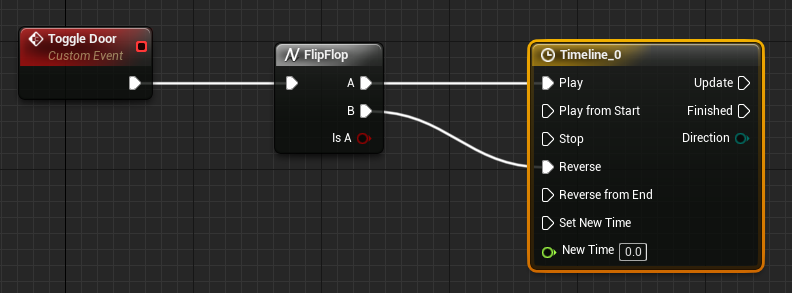
Timelines have a lot of different uses and are helpful in many cases. Basically, they’re awesome. For this project, we’re going to use ours in a very basic way.
19. Double click on the Timeline to open its menu.
20. Create a Float Track using the top left button. Call it Alpha.

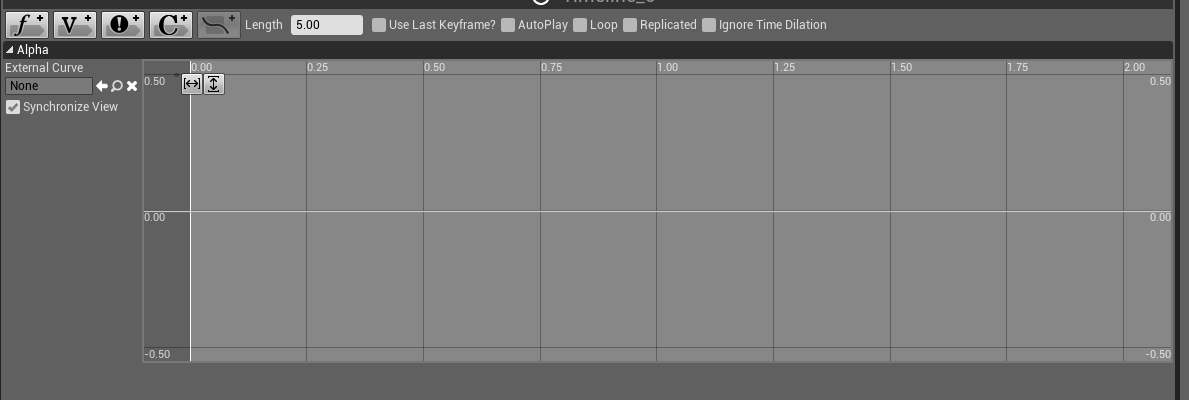
21. Create two timeline Keyframes by right clicking anywhere on the timeline and select Add Key to CurveFloat_0.
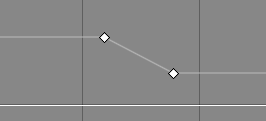
22. Select the first one, and change the Time to 0 and Value to 0.
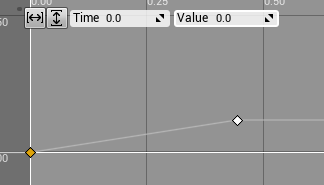
23. Select the second one, and change the Time to 1 and Value to 1. Above, change the Length to 1. This should correspond to the time of the final keyframe. This Time value is in seconds, and can be changed to whatever you want. This is the time it takes for the door to go from open to closed (and vice versa).
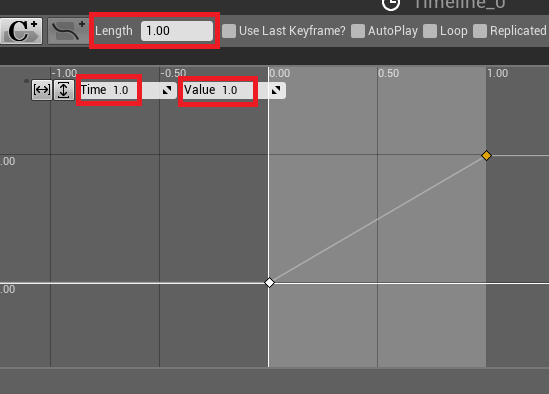
24. Switch back to the main Event Graph window. Now, our timeline should have a new float output called Alpha.
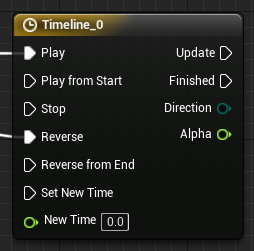
Connect it to a Lerp (Rotator) node.
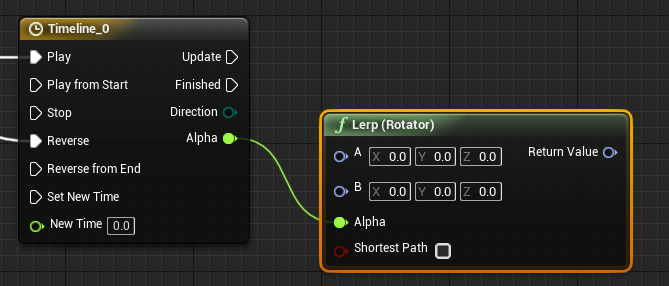
25. Connect the Lerp Rotator A to the Start Rotation variable and connect B to the End Rotation variable.

26. Connect the Return Value to the input of a Set Actor Location node, and connect that node to the Update output on the timeline. Our final Toggle Door event should look like this.
Basically, we’re using a Timeline to lerp between two rotations and rotate our door to those rotations. That way, the door will smoothly open and close when this event is run. The timeline is acting as both the lerp Alpha and constantly running the Set Actor Rotation node. It will take 1 second for the door to toggle rotations.
Our door is done! Let’s move on to the player interaction. Make sure to Compile and Save.
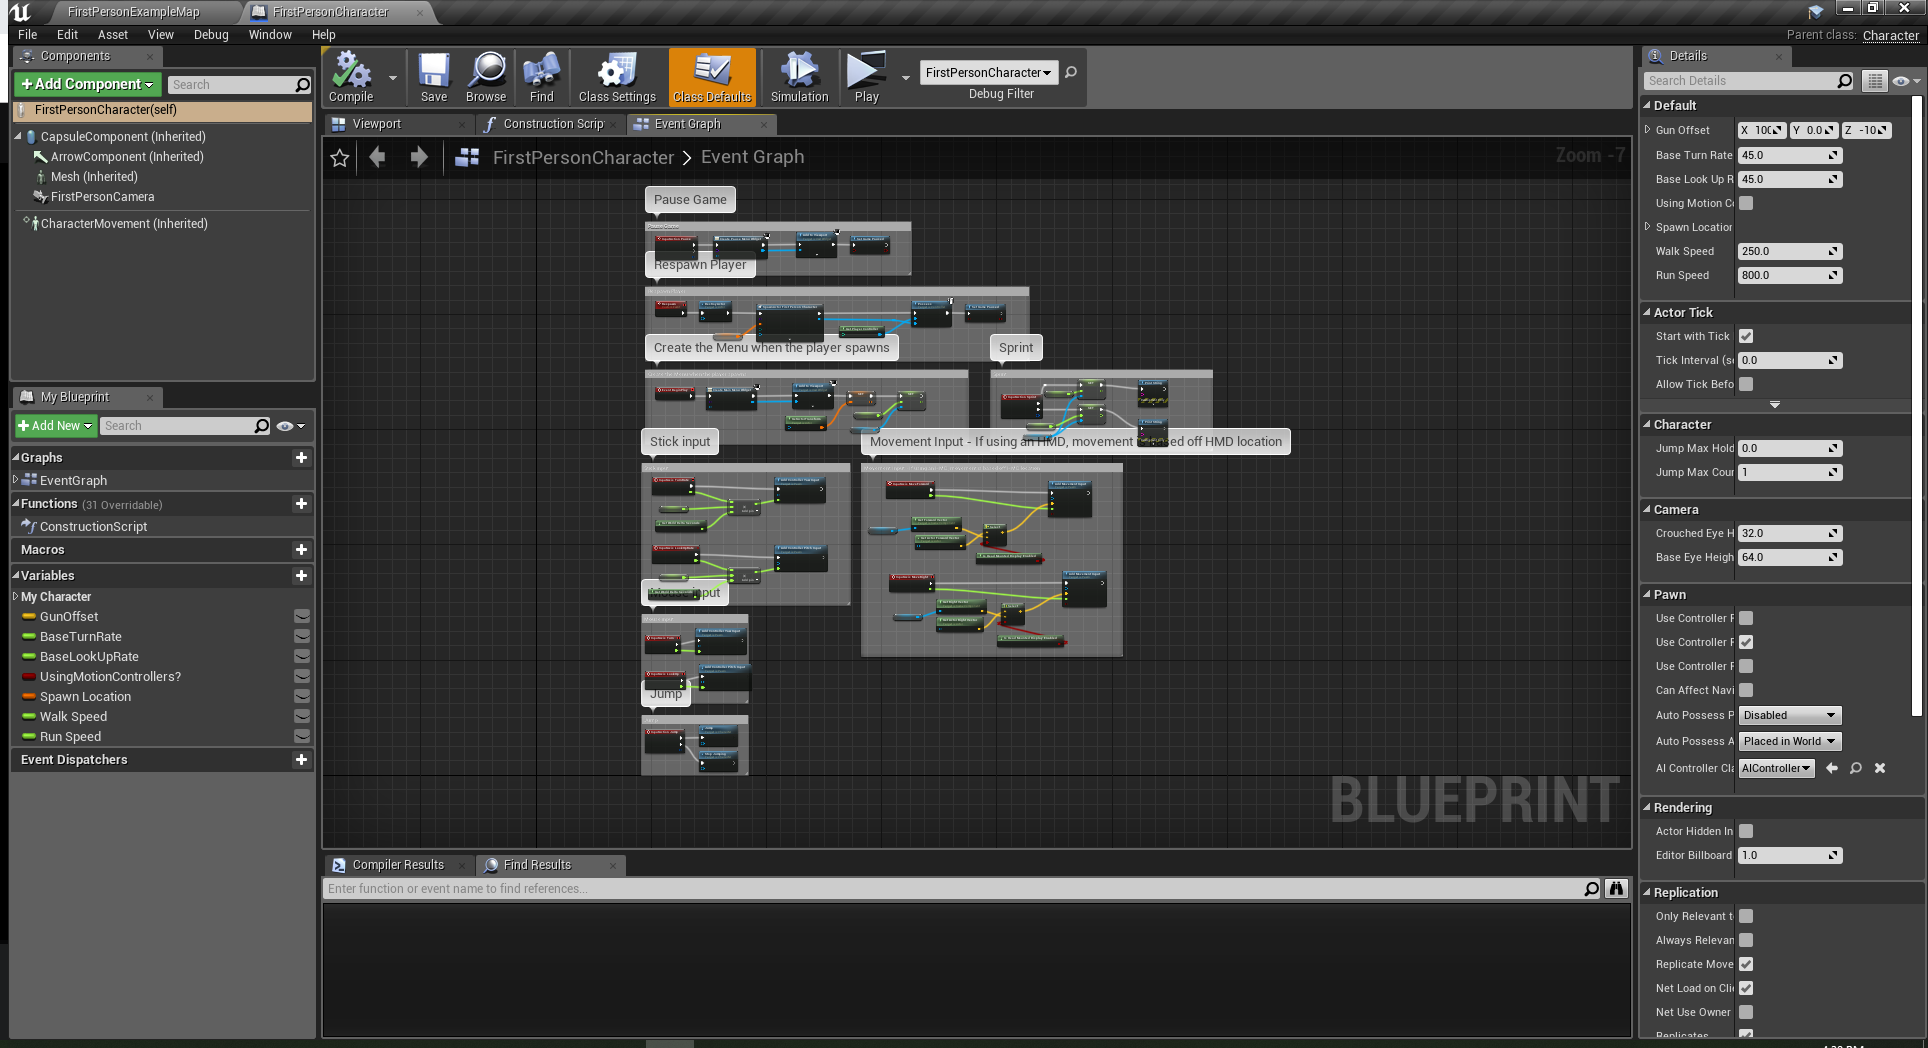
27. Open the FirstPersonCharacter Blueprint in FirstPersonBP/Blueprints/

28. Create a new InputAction node for the Interact keybind we made earlier.
29. Connect a LineTraceByChannel node to the Pressed output, and change the Trace Channel to Interact.
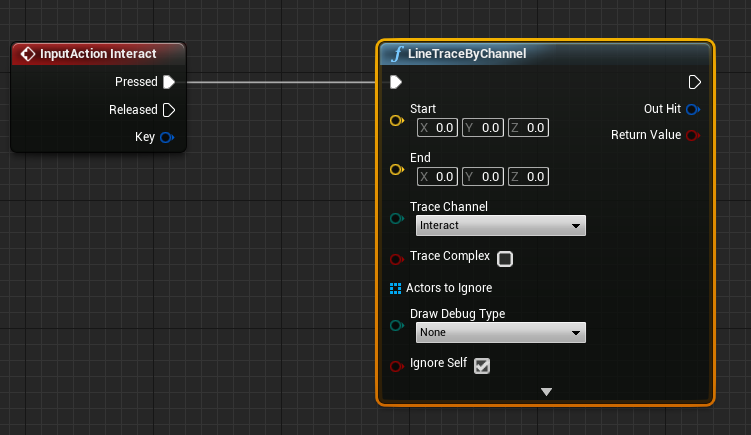
The LineTraceByChannel is the equivalent to the Ray Cast in Unity.
30. We need to draw a line forward from the Player’s camera. Drag the FirstPersonCamera from the Components panel to the Event Graph.
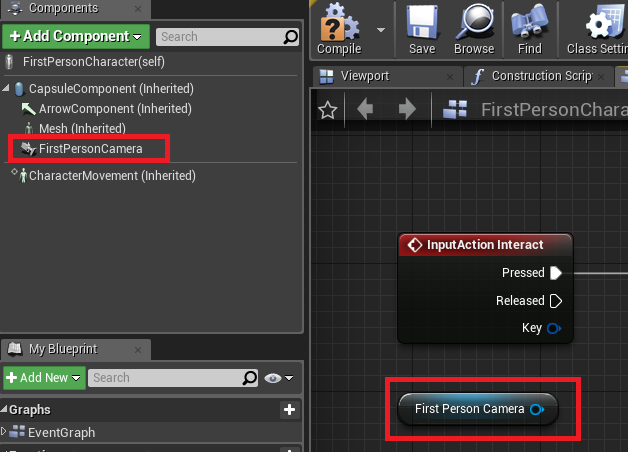
31. Get the World Location of the Camera and connect that to the Start on the Line Trace.

32. Get the World Rotation of the camera. Connect that to the Get Forward Vector node, and multiply that by 500. Add the Get World Location to this multiply output. Connect this to the End input.

33. Connect a Branch node to the end of the Line Trace, and connect it to the Return Value.
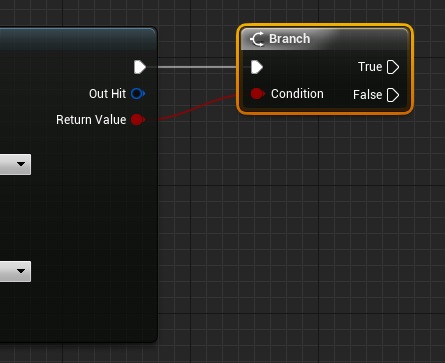
This Return Value will be true if the trace actually hits something. This way, we’re not running the rest of the event constantly if we don’t even need to.
34. Connect the Out Hit to a Break Hit Result node. Connect a Cast to BP_Interact_Door to the Hit Actor. Run the Toggle Door event we created. This is how the final event will look:
We’re done! When we press E on a door, it should toggle open and closed now. The door model can be swapped with anything, just be sure to watch where the pivot is and move the door accordingly.
